Applying structure within a level
Applying structure within a level
You have structured your document with headings that indicate different levels and that should also appear in the table of contents.
Lengthy textual passages where you want to make the necessary subdivisions can also be further structured. For this, you have two sets of paragraph headings available in the Format pane:
• Numbered paragraph headings, linked to the level of the heading to which they belong.
• Numbered paragraph headings, without a level link to the heading to which they belong.
Paragraphs created with either set will never appear in an (updated) table of contents.
Adding paragraph headings created with either set works in the same way as adding paragraph headings that mark levels in the text and that do appear in an (updated) table of contents.
Adding numbered paragraph headings with linked numbering
The following example shows that one text level is sufficient. For the topic discussed, only the indication of this level should appear in the table of contents. Within this level, the topic deserves further structuring.
In the example used, several headings have been applied in the text.
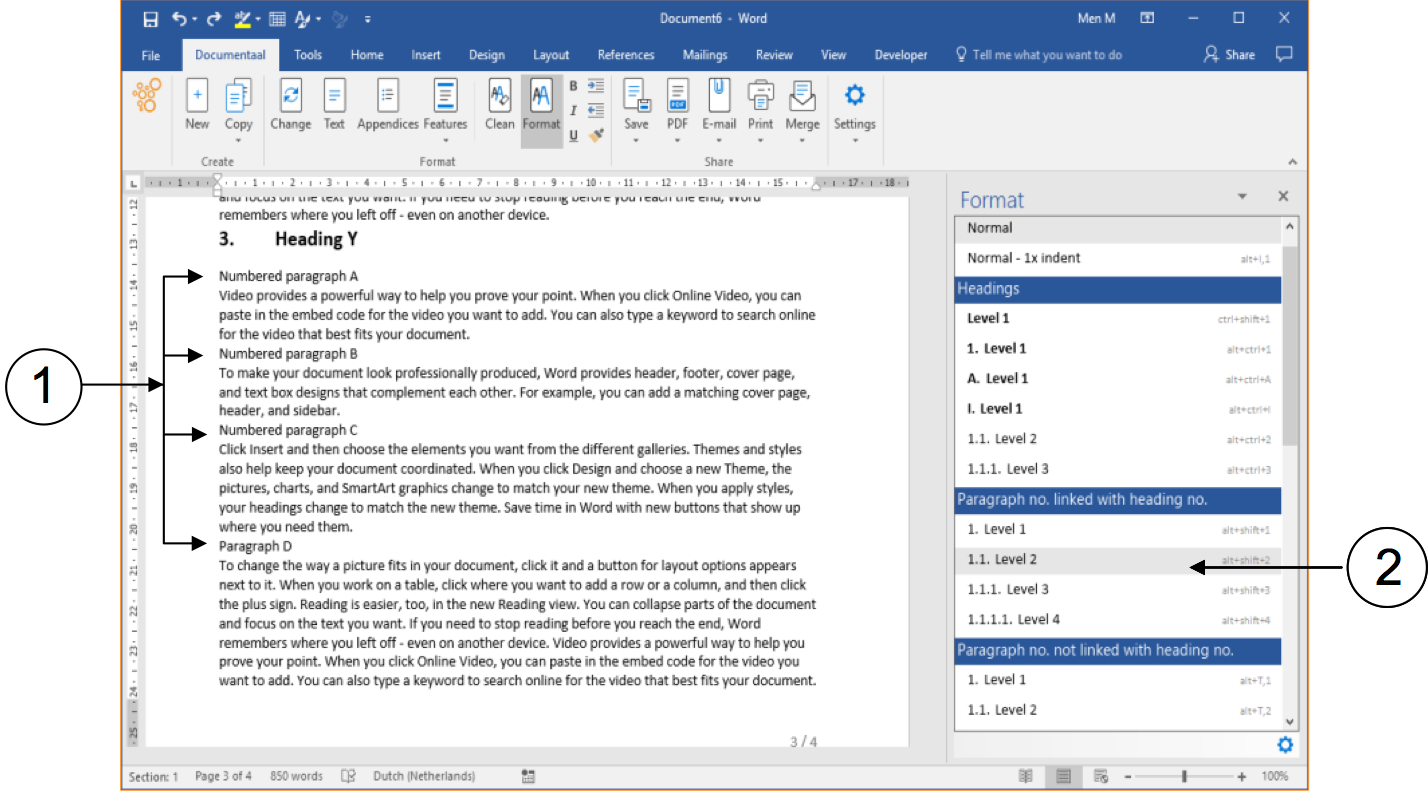
① Headings with which you will create further structure.
② The set of numbered paragraph headings, with which you create structure within the text level, but which
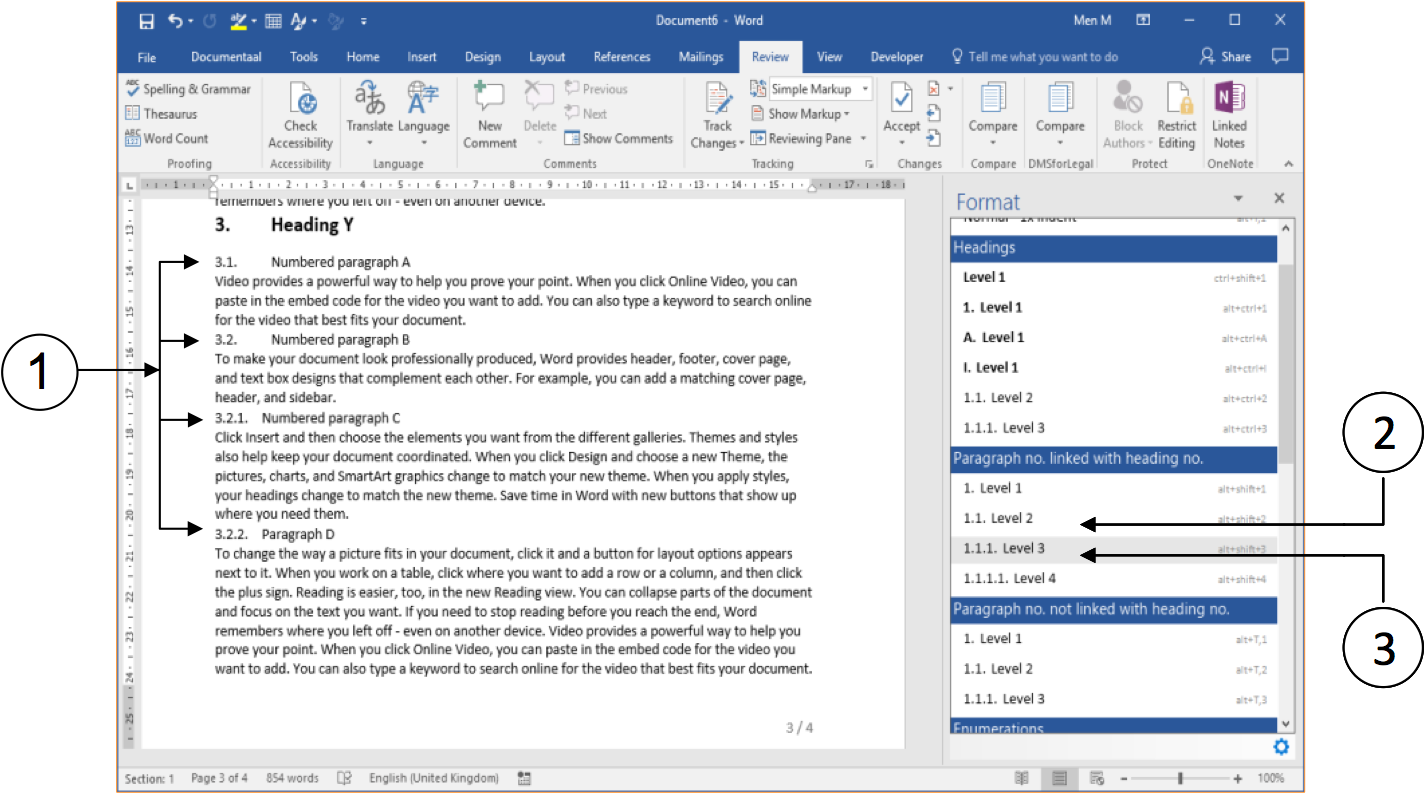
① Numbered paragraph headings that will not appear in the table of contents.
② Level 2 headings are used for the top two paragraph headings.
③ Level 3 headings are used for the bottom two paragraph headings.
If you create a numbered paragraph heading of a lower level than the heading before it, dStyle365 (LegalWord365) automatically adjusts the numbering to the preceding heading. This can be seen in the numbering of the top two paragraph headings, compared to the bottom two: both are one level lower.
Adding numbered paragraph headings without linked numbering
The actions you perform to insert numbered paragraph headings without a heading link are almost the same as the actions you need to insert numbered paragraph headings WITH a link. You simply use the other set.
If you have already created a layout with numbered paragraph headings and you want to adapt this, it is advisable to first "reset" the headings to the Normal style. This is explained in the following instruction.
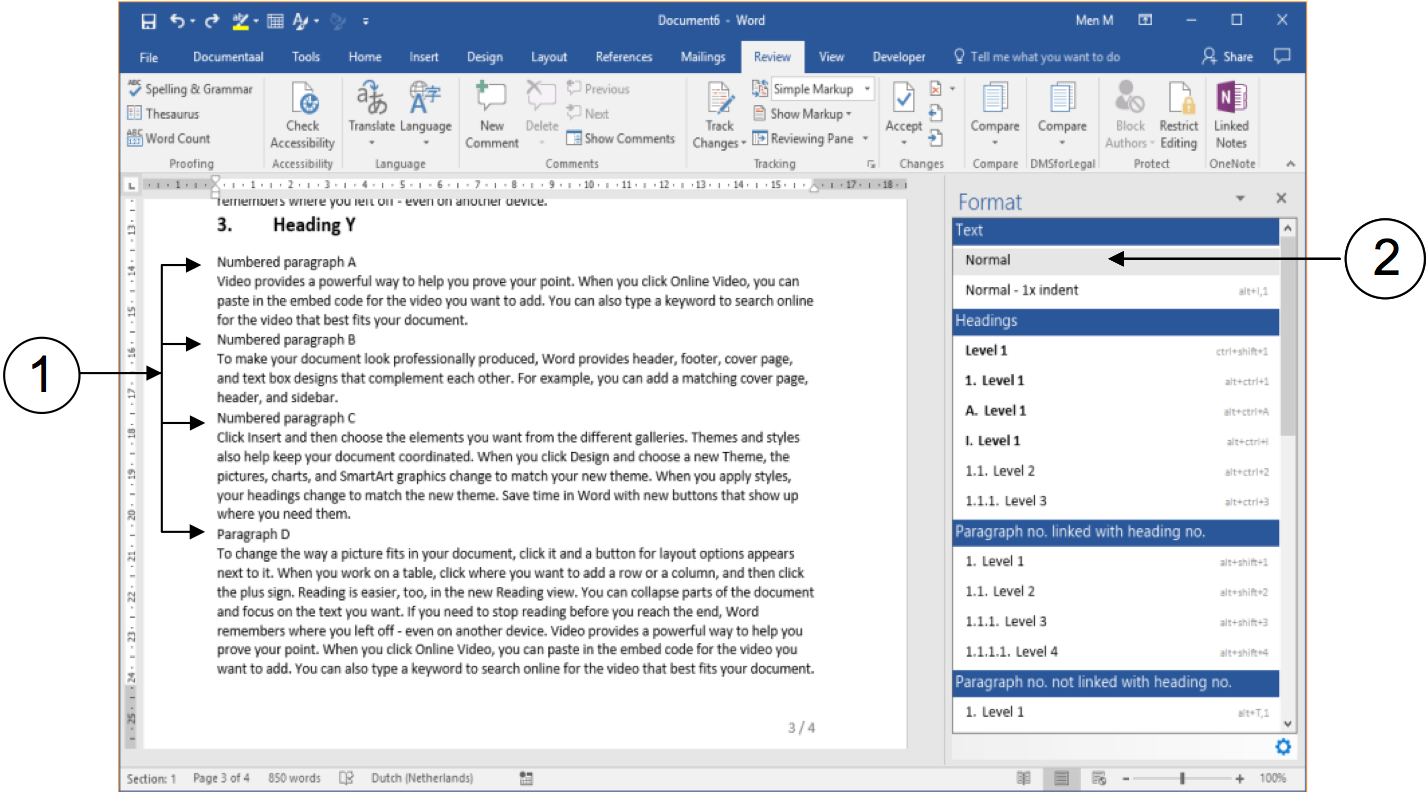
① Click on a paragraph heading that you have styled.
② In the Format pane, click the Normal option. This removes all formatting settings.
Repeat these steps until you have reset all paragraph headings that you want to adjust to unformatted text.
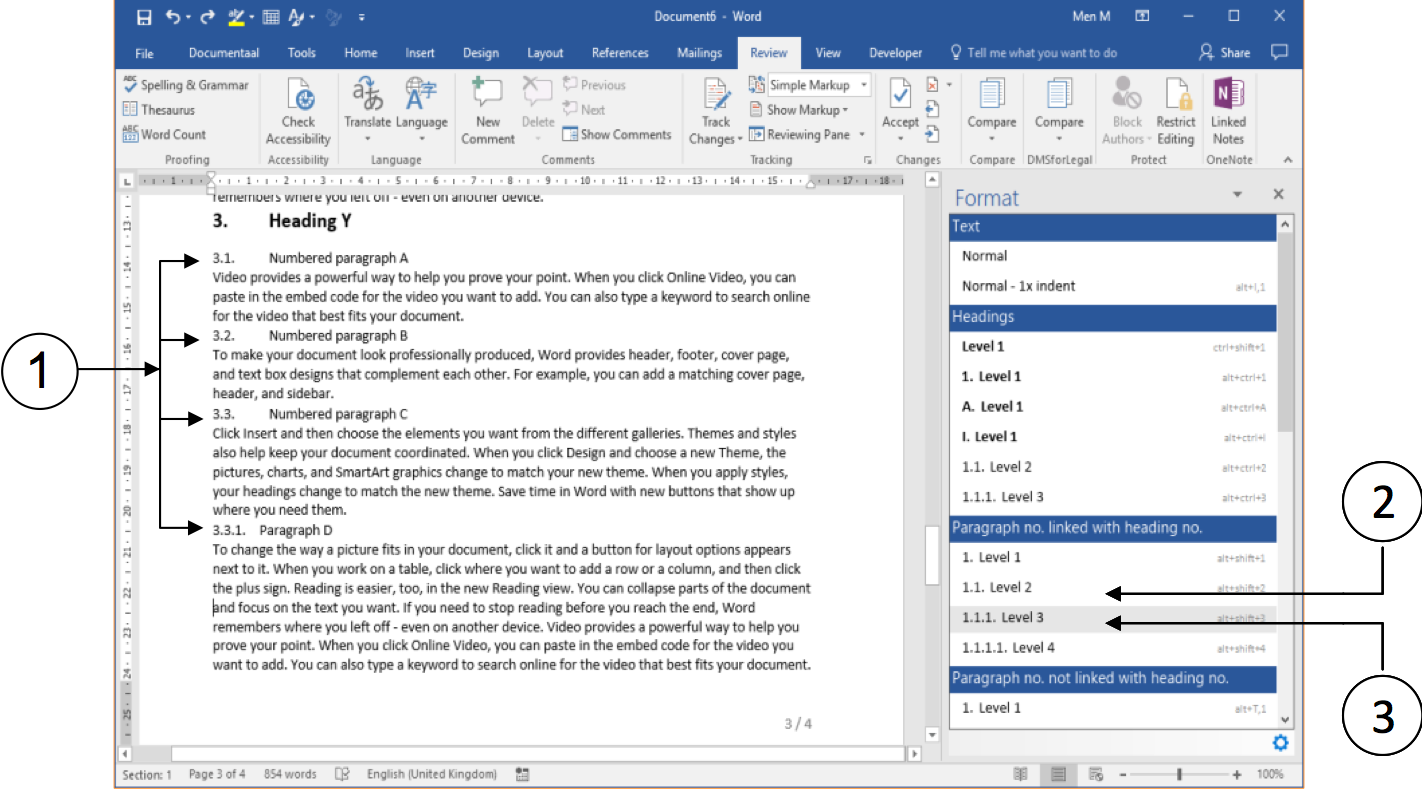
① Numbered paragraph headings without linked numbering. These paragraphs will not appear in the table of contents.
② Level 2 headings are used for the top three paragraph headings.
③ Level 3 heading is used for the bottom paragraph heading.
If you create a numbered paragraph heading of a lower level than the heading before it, dStyle365 (LegalWord365) automatically adjusts the numbering to the preceding heading. This can be seen in the numbering of the top three paragraph headings, compared to the bottom one: this is one level lower.
Updating the Table of Contents
In the previous actions, several numbered paragraph headings were added within a level of text fragments. These numbered paragraph headings should not appear in the table of contents. In the following screenshot, one extra numbered heading is included in the example text, which should appear in the table of contents.
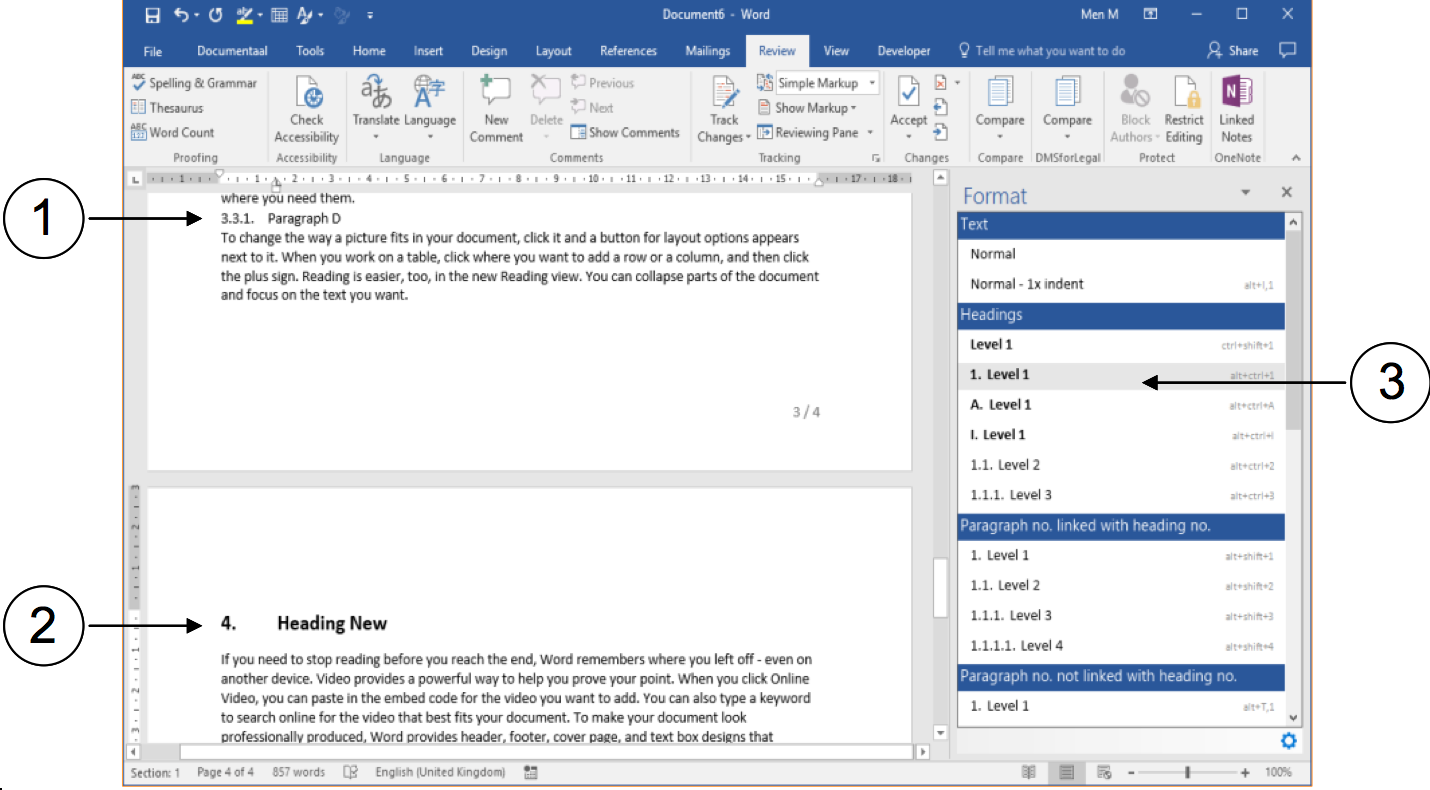
① One of the numbered paragraph headings without linked numbering and which should not appear in the table of contents.
② New heading that should appear in the table of contents.
③ Selected style for a numbered heading (highest level – chapter heading).
Now that several changes have been made, it's time to update the table of contents. Never forget this step when working with tables of contents. It looks very sloppy if an unupdated table of contents misleads the reader!
You can update the table of contents included in a document from any position within it. You don't necessarily have to go to the location of the table of contents to do so. For clarity, this has been done here.
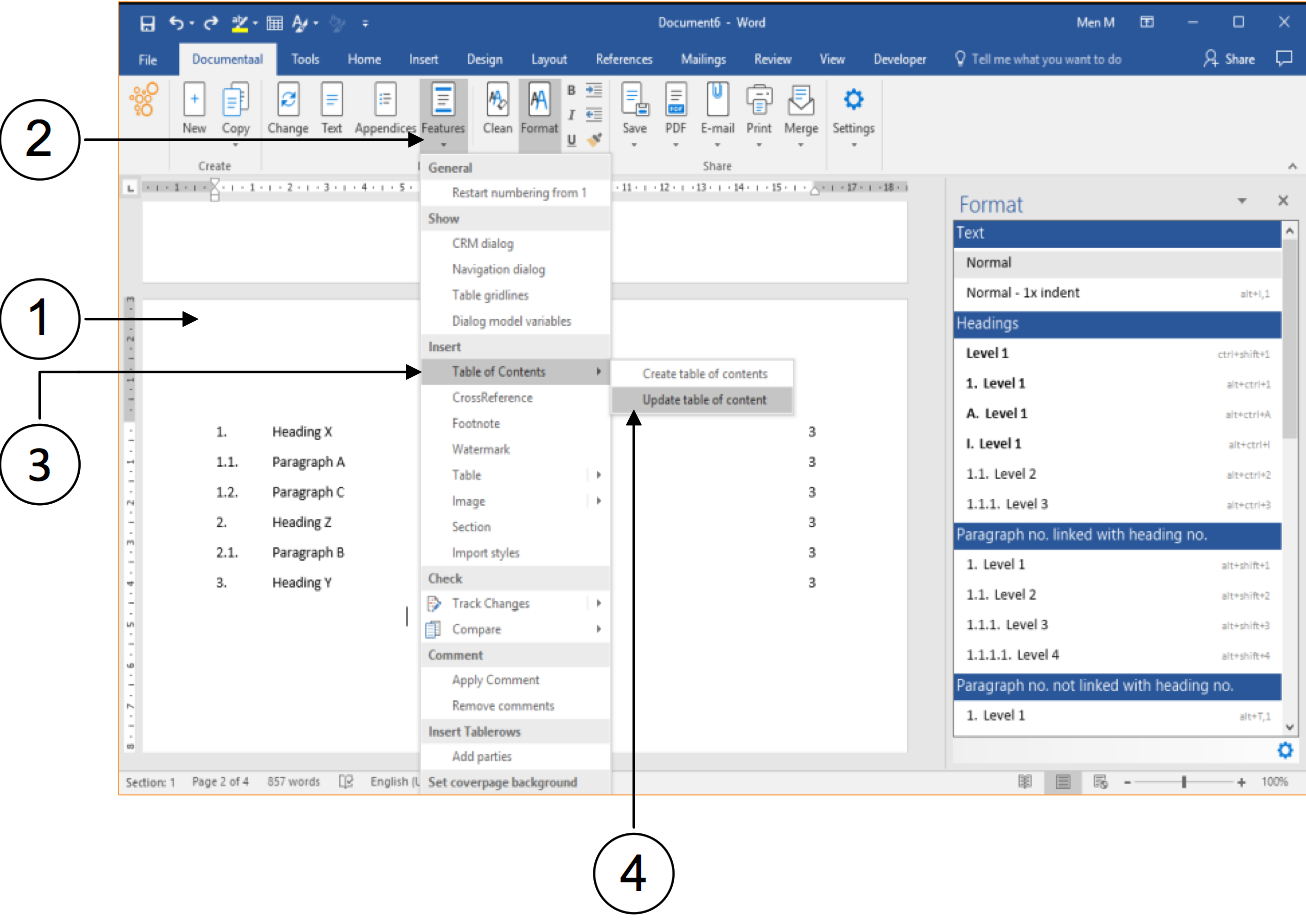
① (Go to) the page where the table of contents appears.
② Click on the Features heading. A dropdown menu appears.
③ Select the Table of Contents option. A submenu appears.
④ In the submenu, select the Update Table of Contents option. The table of contents will now be updated.
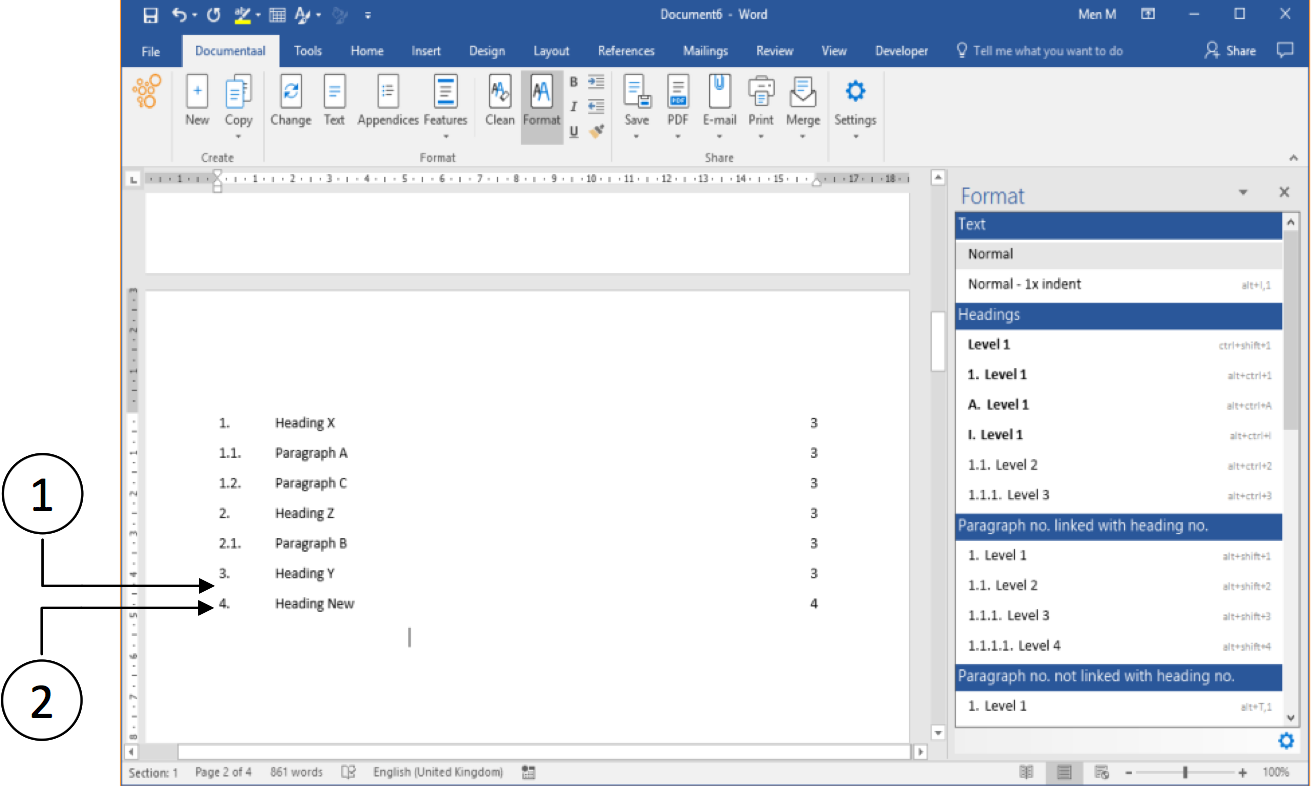
① None of the additionally added numbered paragraph headings below the highest text level (Heading Y) are included in the table of contents.
② The newly included text part at the highest level (Heading New) is included in the table of contents.