Lists and renumbering
Lists and renumbering
You can also create lists in texts. This is a standard Word functionality that dStyle365 (LegalWord365) handles intelligently. In the Format panel, several predefined options are available for creating lists: numbered and with so-called "bullets".
In this section, you will learn how to create lists and how to restart numbering for numbered lists.
Bulleted lists
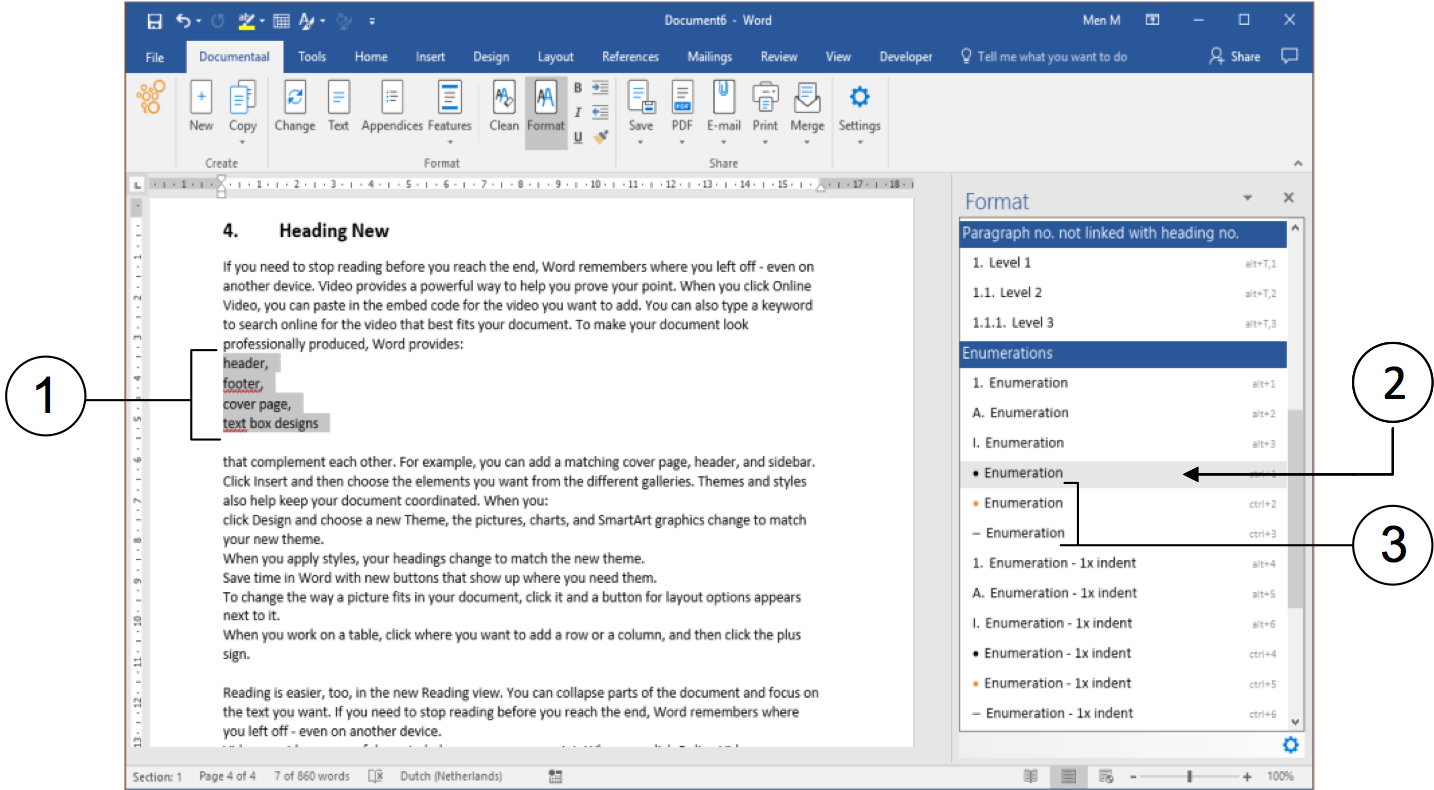
① Select a "plain" list. This is a series of lines of data without numbers or bullets.
② Select one of the bullet numbering options. In this case, it is the • bullet. The lines in the "plain" list will now automatically be provided with this bullet.
③ You apply the other bullets in the same way.
You can also directly apply a different type of bulleted listing to an already formatted selected list.
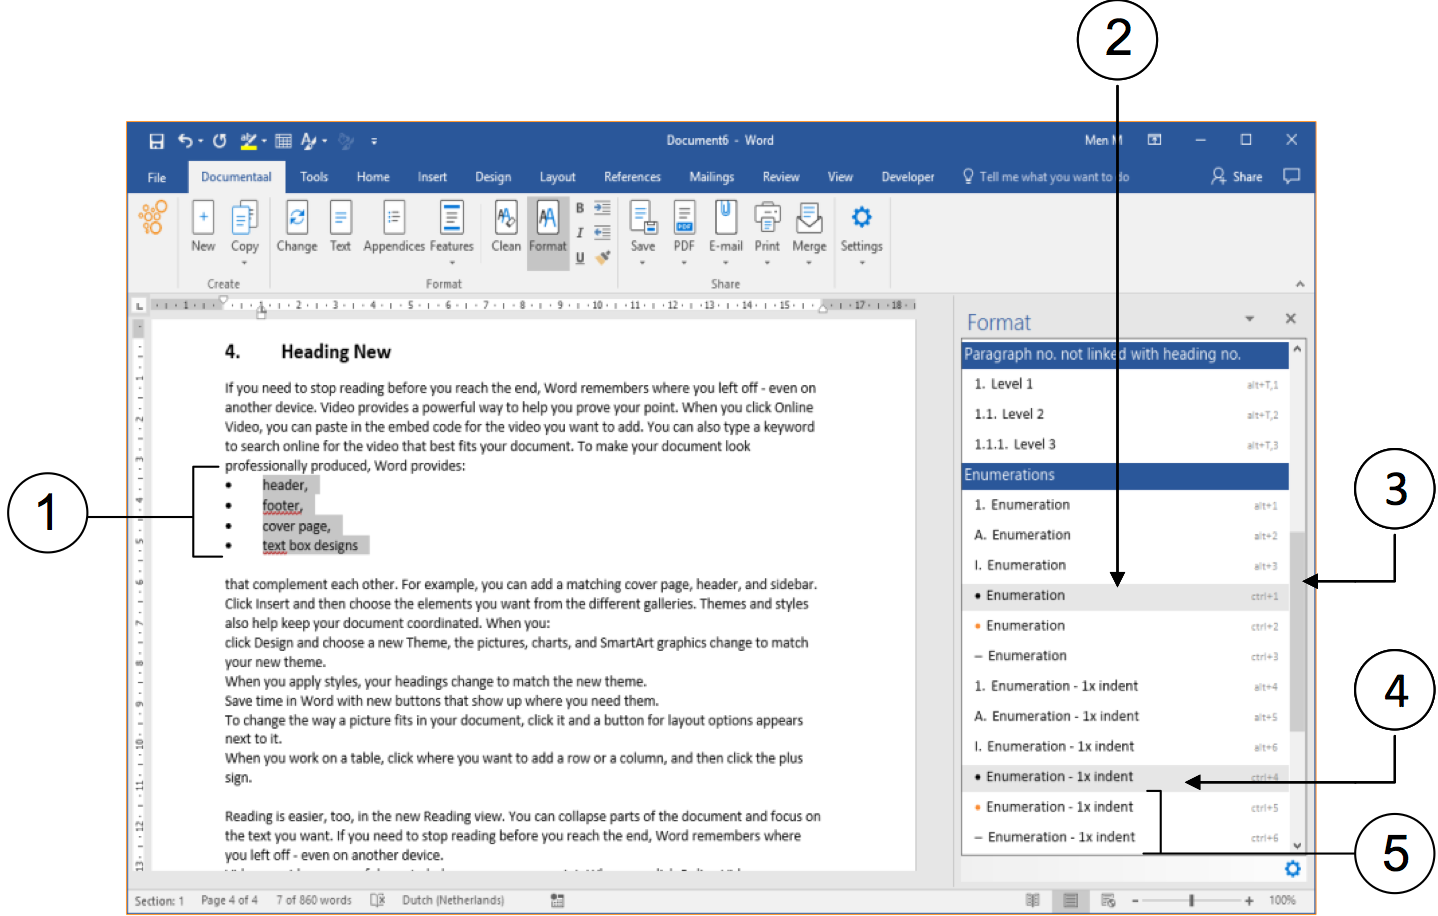
① The list may still be selected. If not, select the list again. You will now choose a bulleted list with indentation.
② The Format panel indicates which formatting is active for the selected text.
③ Use the scrollbar if necessary to choose the correct formatting for bulleted lists.
④ Click on the correct formatting for bulleted lists.
⑤ You apply the other formatting options for bulleted lists with indentation in the same way.
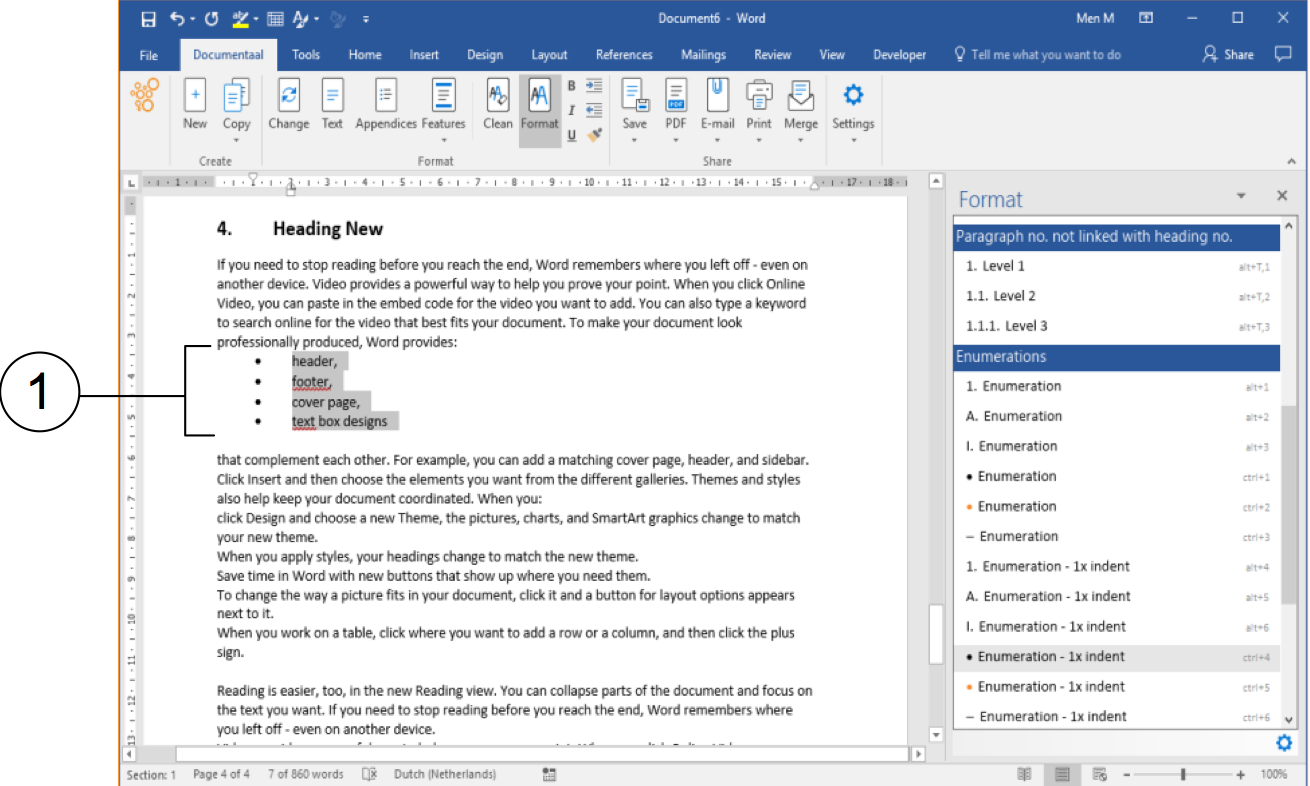
① The list has now become a bulleted list with indentation.
You can also make a part of a formatted list different, for example, to emphasize a difference in level within an existing formatted list. You then select one or more items. This is done in the following example:
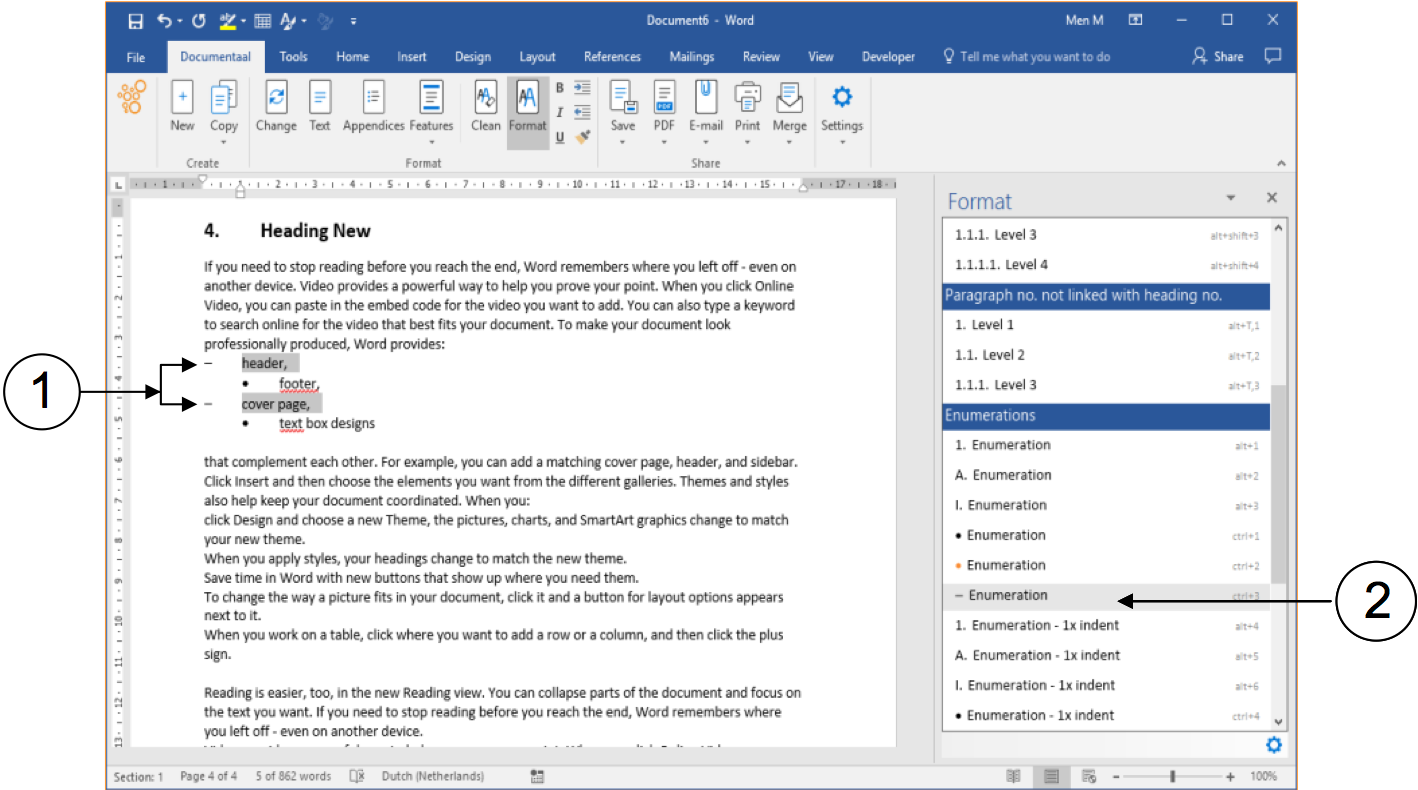
① In the existing and formatted list, two items have been selected separately (Ctrl key pressed).
② You click on the list formatting you want for these selected items. This formatting becomes immediately visible.
Numbered lists
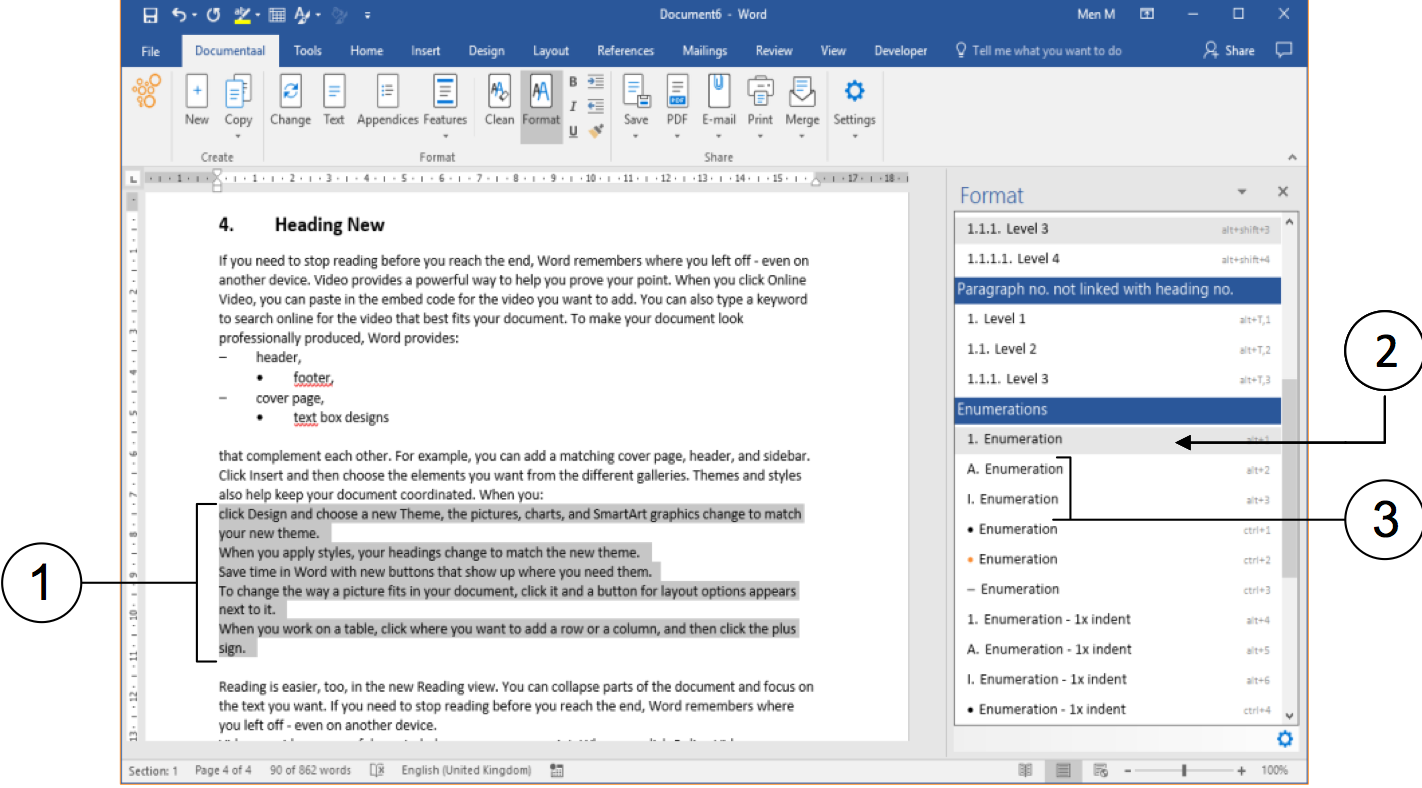
① Select a "plain" list. This is a series of lines of data without numbers or bullets.
② Select one of the formatting options for numbered lists. In this case, it is the list with numbers. The lines in the "plain" list will now automatically be provided with this bullet.
③ You apply the other numbered lists (with letters or Roman numerals) in the same way.
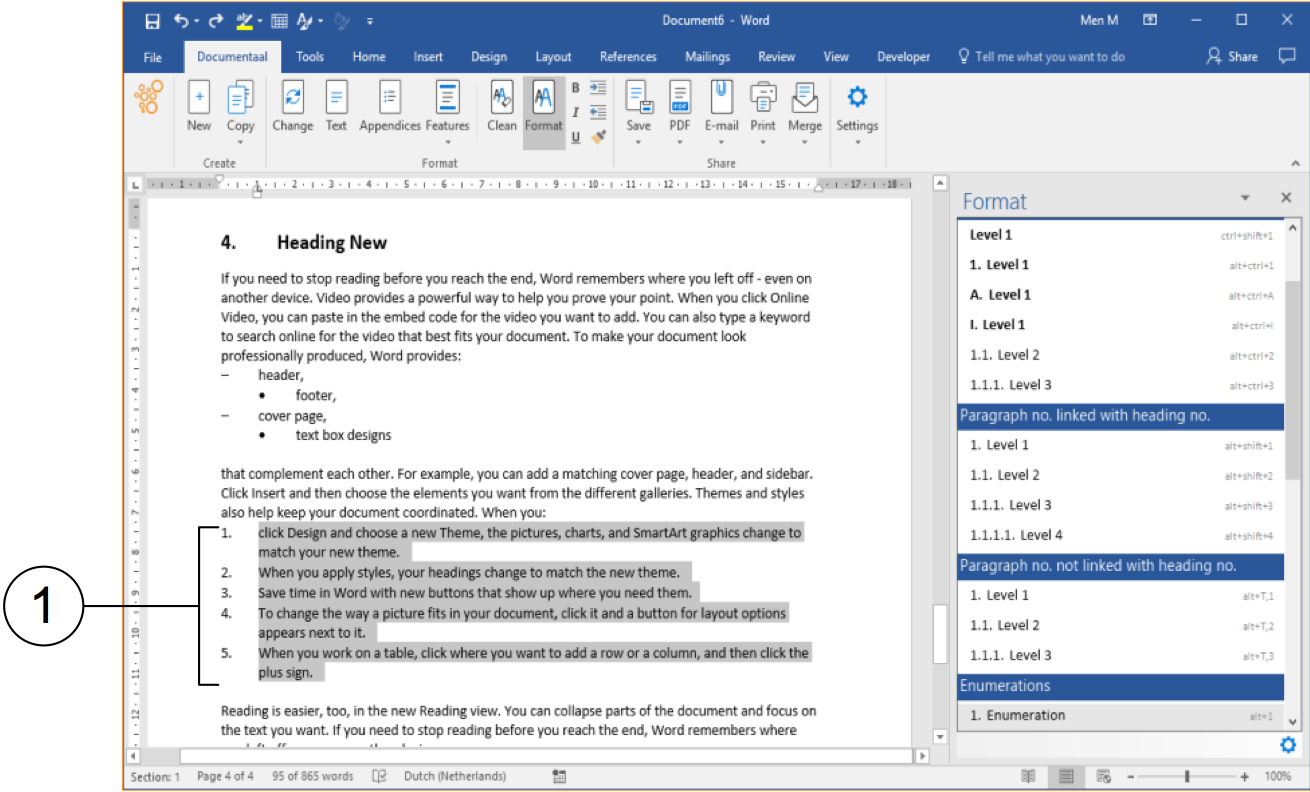
① The "plain" list is immediately provided with a correct numbered list.
If you want to add an extra item "somewhere" in the list, you can. Click at the end of the item preceding your new item and press the Enter key on your keyboard. Word will automatically adjust the numbering in the selected list style.
Restart numbering
Once you have created a numbered list (or with letters or Roman numerals) anywhere in your document, Word will continue numbering by default, no matter where you are in a document. This can be annoying. Therefore, dStyle365 (LegalWord365) has an improved Word function built in that allows you to start standard numbered lists at 1. (letters: A; Roman numerals: I).
In the following example, we use an existing numbered list where a previous bulleted list has been converted into a numerical list.
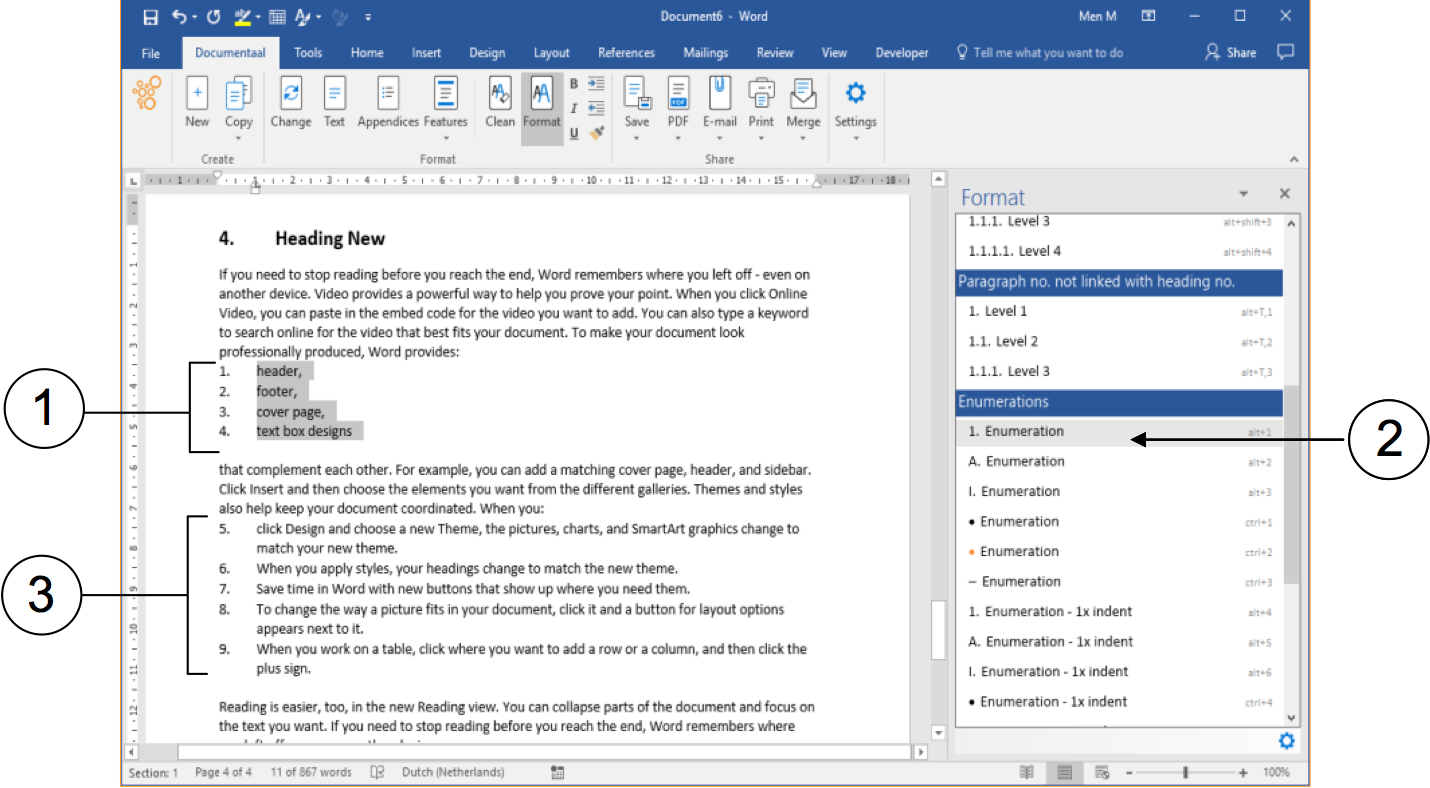
① A previous bulleted list is converted to a numbered list.
② In the Format panel, the enumeration style with numbers has been chosen.
③ In another numbered list further down, the numbers have been incremented. This can be an unwanted effect.
The same effect occurs if, after a first numbered list, a second numbered list is created later in the same document.
Renumbering
Restarting a numbered list at number 1 is done in three clicks:
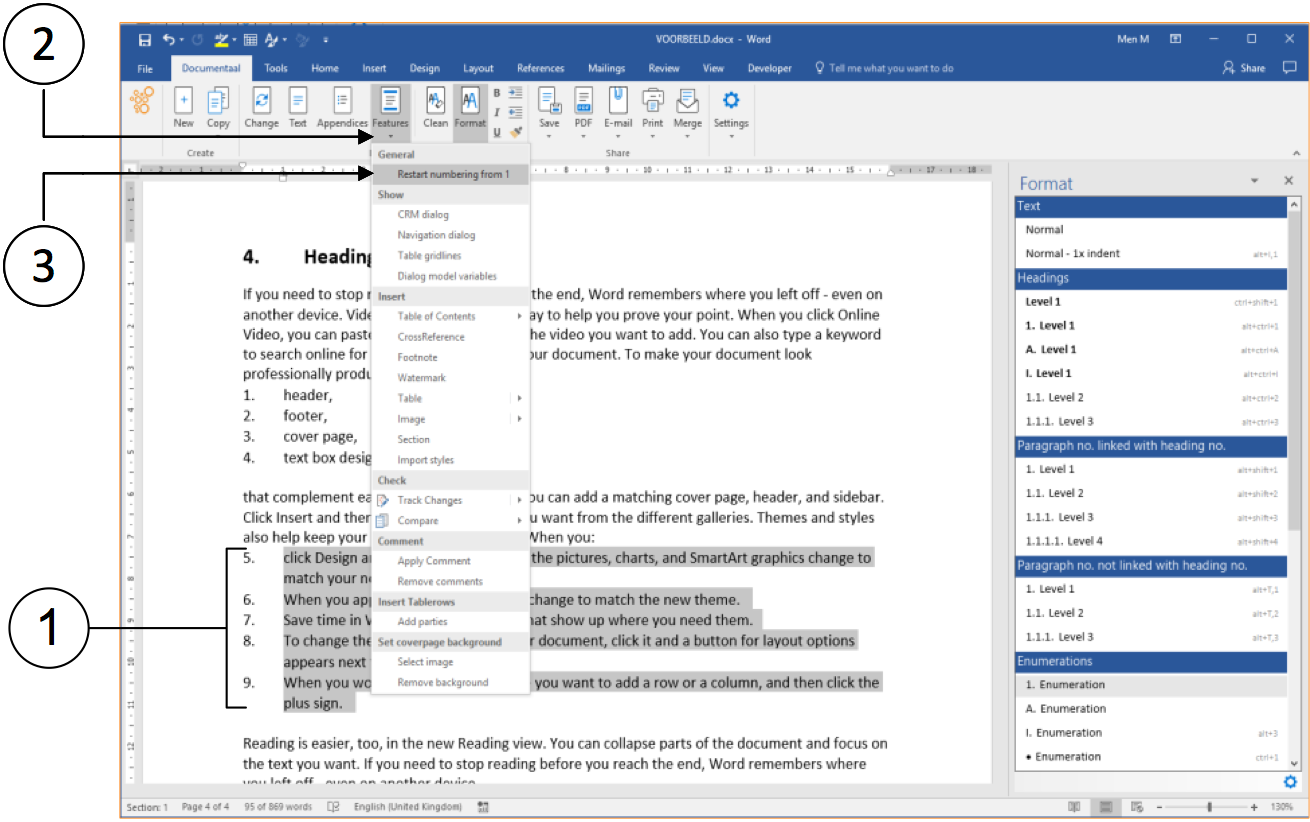
① Select the numbered list that should start at number 1.
② Click on the dStyle365/LegalWord365 ribbon on the Features option. A drop-down menu will appear.
③ Click on the Restart Numbering from 1 option. The numbering will now automatically be adjusted, starting with number 1.
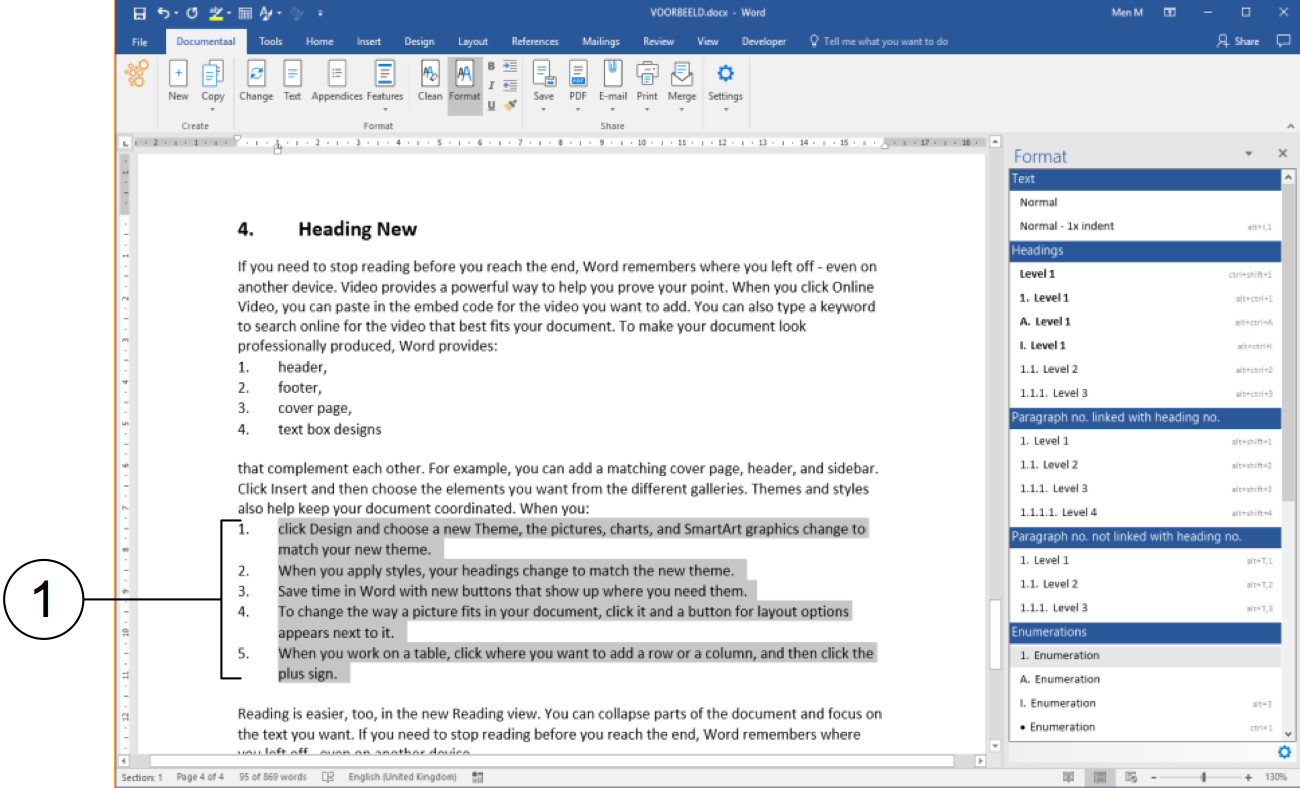
① Adjusted numbering in the list, starting with number 1.