Cross-references in Microsoft Word are useful tools that allow you to refer to other parts of your document, such as chapters, sections, tables, figures, or footnotes. They make it easy to jump to these items without manually changing page numbers or other details if the document changes.
Here is a step-by-step guide to creating cross-references in Microsoft Word:
Place the cursor at the location in your document where you want to insert the cross-reference.
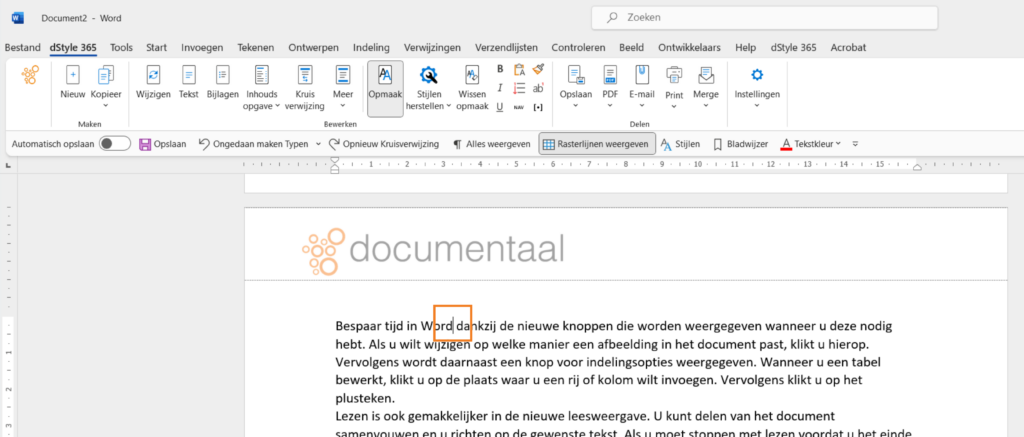
Go to the "References" tab in the menu bar at the top of the Word window. Click the "Cross-reference" button in the "Captions" group. This opens the "Cross-reference" dialog box.

In the "Cross-reference" dialog box, you can choose the type of item you want to refer to, such as a chapter, section, table, figure, or footnote. Select the desired type from the "Reference type" drop-down list.
Select the item you want to refer to. You can also browse through the document and select the desired item.
After you have selected the desired Reference type and item, you can choose how the cross-reference should appear in the "Insert reference to" box. For example, you can insert the cross-reference's text, page number, chapter or section number, and so on.
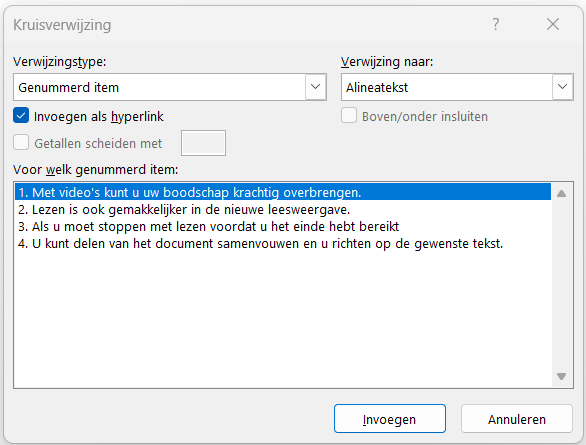
Click the "Insert" button to insert the cross-reference at the selected location in your document.
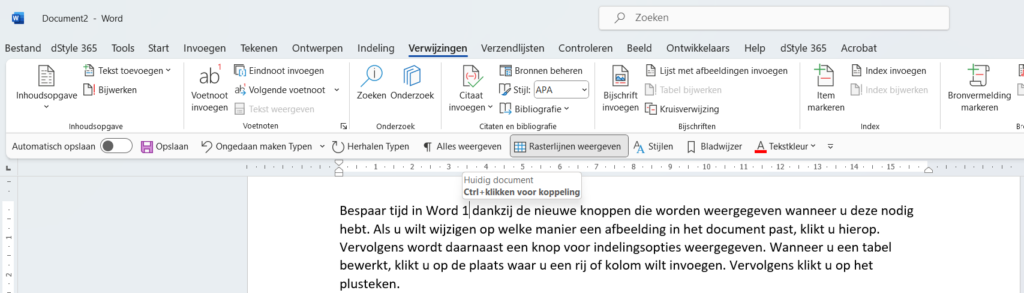
The cross-reference has now been placed at the cursor's position. By clicking on it while holding down the Ctrl key, the reader automatically navigates to the indicated text in the document.
Note: If your document undergoes changes, such as adding, deleting, or reordering chapters, sections, tables, figures, or footnotes, you can update the cross-references by right-clicking on the cross-reference and choosing "Update Field".
dStyle365/LegalWord365
In the dStyle365/LegalWord365 ribbon, we have included a simplified version of the cross-reference.

Clicking the Cross-reference button will display the Cross-reference panel.
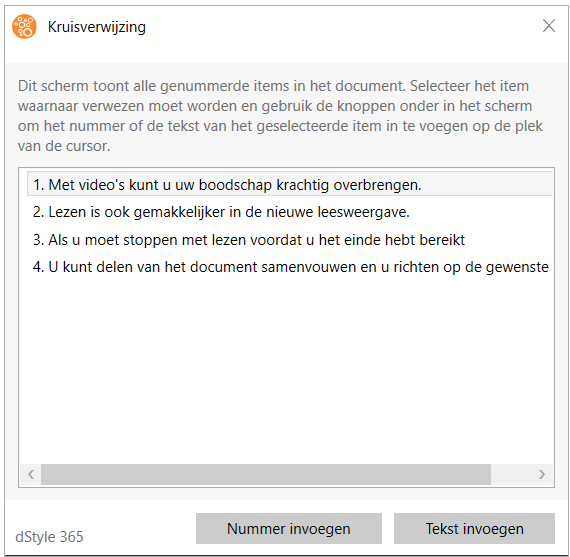
In the panel, you can immediately see all numbered items in the document. At the cursor's position, you can insert a number or text with a single click. Then, click the 'x' in the top right of the window to close it. A number or text has now been inserted into the document at the cursor's position. By holding down the Ctrl key and clicking on the item, you will automatically go to the indicated text in the document.
Using cross-references, you can easily navigate through your document and ensure that references are always up-to-date, even if the document's structure changes.
For more information, please also visit our partner Microsoft's site: Create a cross-reference