At Documentaal, Dynamic Models refer to a combination of a template (letter, blank document, report, procedural document) and content (text fragments, paragraphs, sections, etc.). We call it dynamic because the template and content are only brought together at the moment a document based on a dynamic model is created. This means you always have the latest version of the template and the latest version of the content. For example, if the logo has been adjusted over time, or the margins have changed, the model evolves with you.
This is in contrast to a Static Model. With a Static Model, it is determined in advance which template and which content will be included in the model. This Static Model is, as it were, a snapshot of the then-current template and content and will therefore not change when the used template or content is adapted.
To create a Dynamic Model, it is necessary that you have the Tools ribbon available. Usually, only administrators have access to the Tools ribbon.
Dynamic models are created from the Tools ribbon.
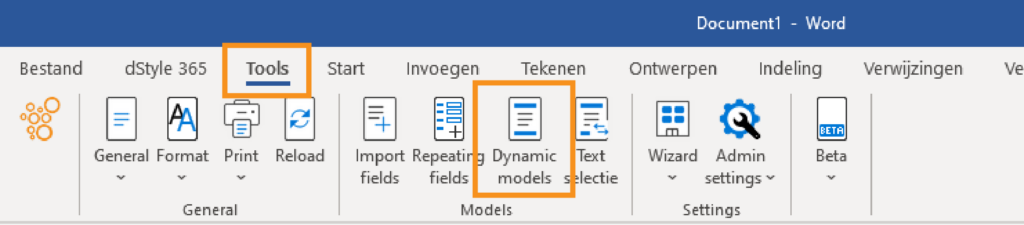
In the Tools ribbon, go to Dynamic models.
Creating a Dynamic Model
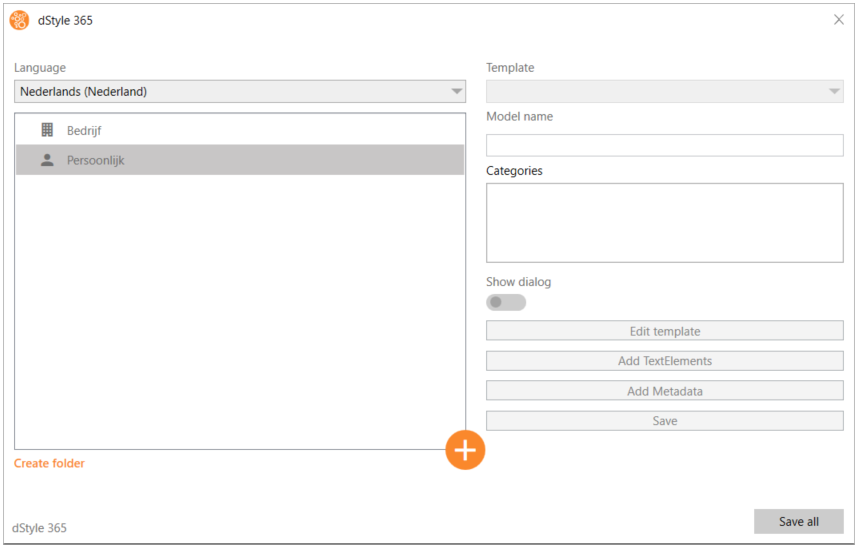
From the screen that opens, you can create a Dynamic Model.
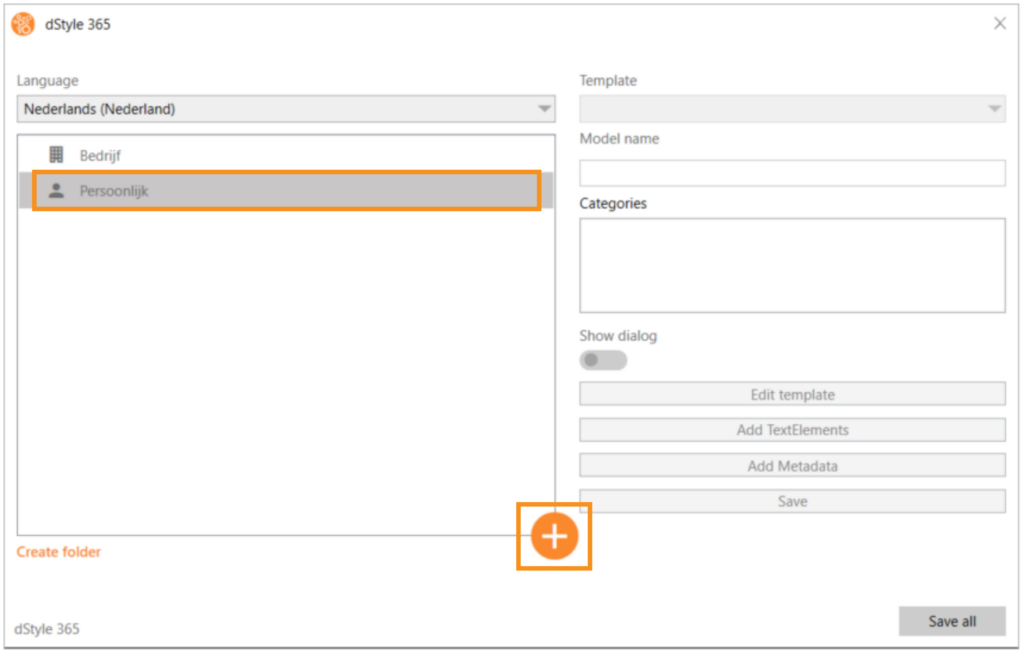
Select the location where you want to save the model. In this case, we choose Personal, but you can also save it under Company. In that case, the model will be available to everyone within your organization. By clicking Create folder, you can create folders and sub-folders to save the model in that location. Then click the plus button to create a new Dynamic Model.
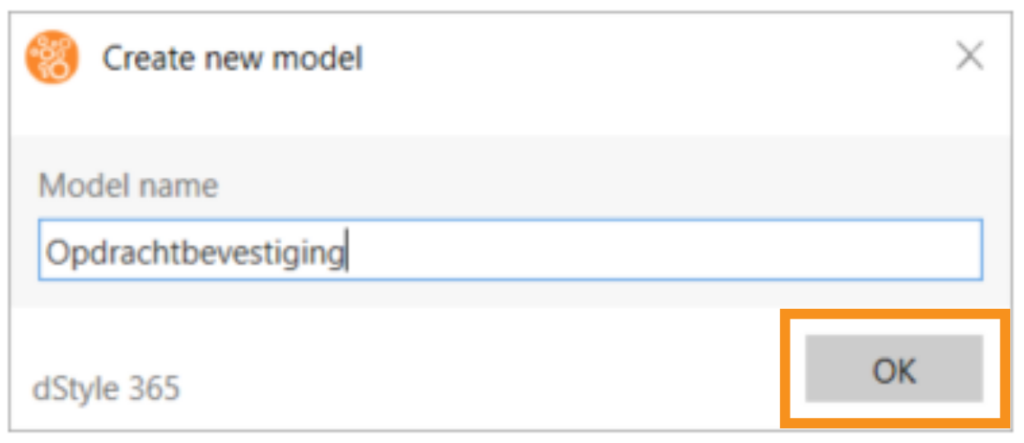
Give the model a clear description and click OK.
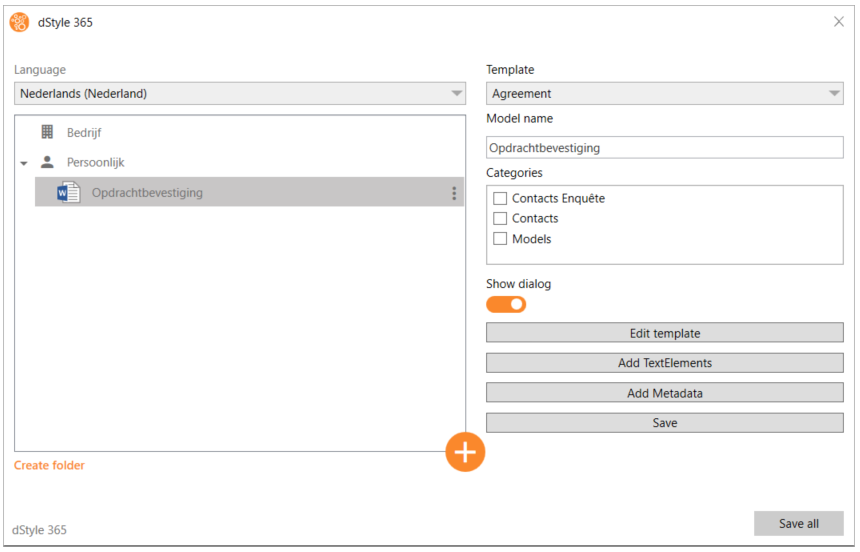
After the model is created, you will see it appear in the window on the left.
Dynamic Model Settings
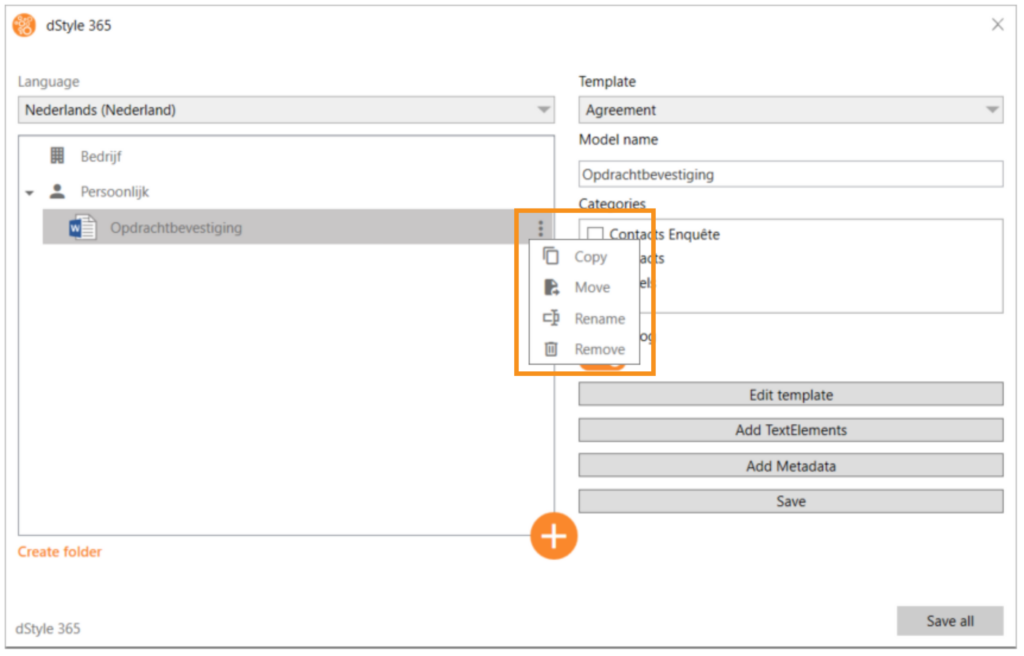
By clicking the three dots to the right of the model's name, you get extra options to copy the model, move it to another location, rename it, or delete it. On the right, you see the options related to the Dynamic Model.
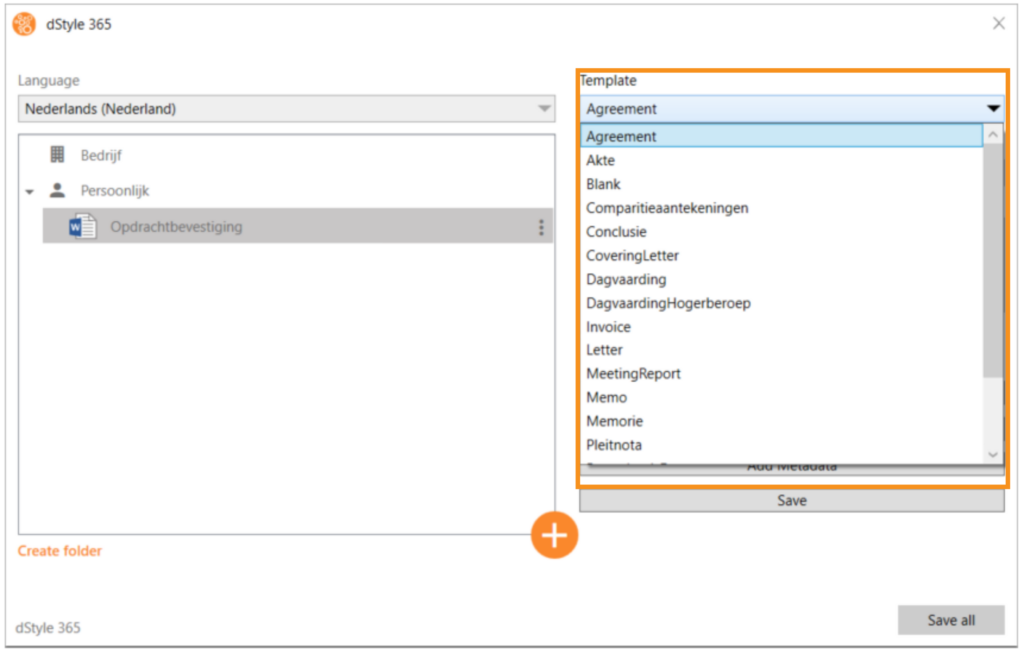
At the top, under Template, you can select the template you wish to use as the basis for the model via a dropdown menu. This determines what the model will look like when you call it up and also the information that can be pre-filled.
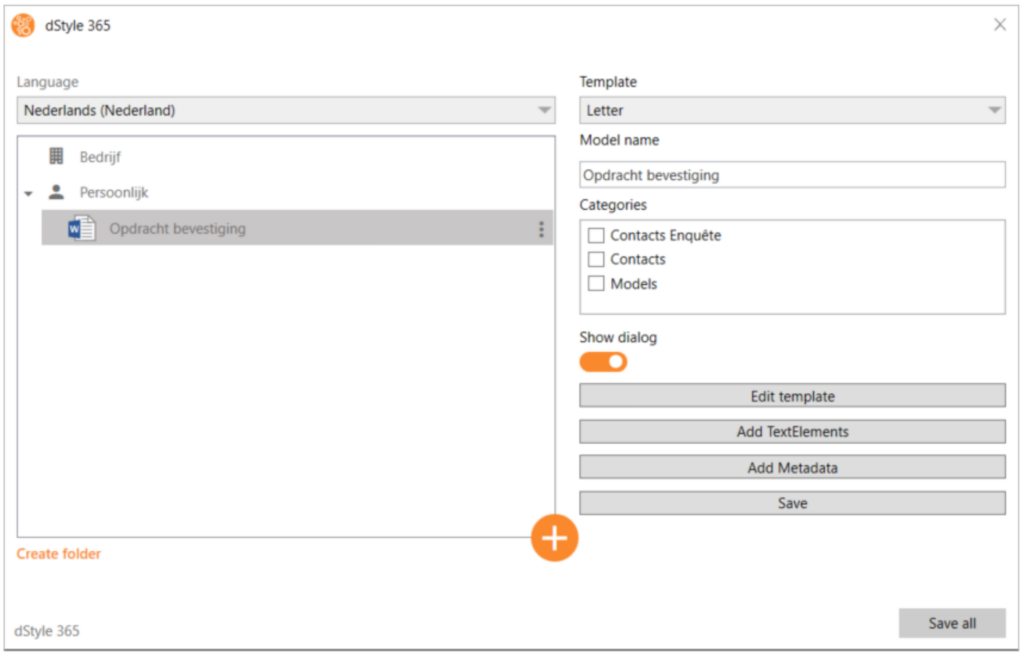
In this case, we choose the Letter template.
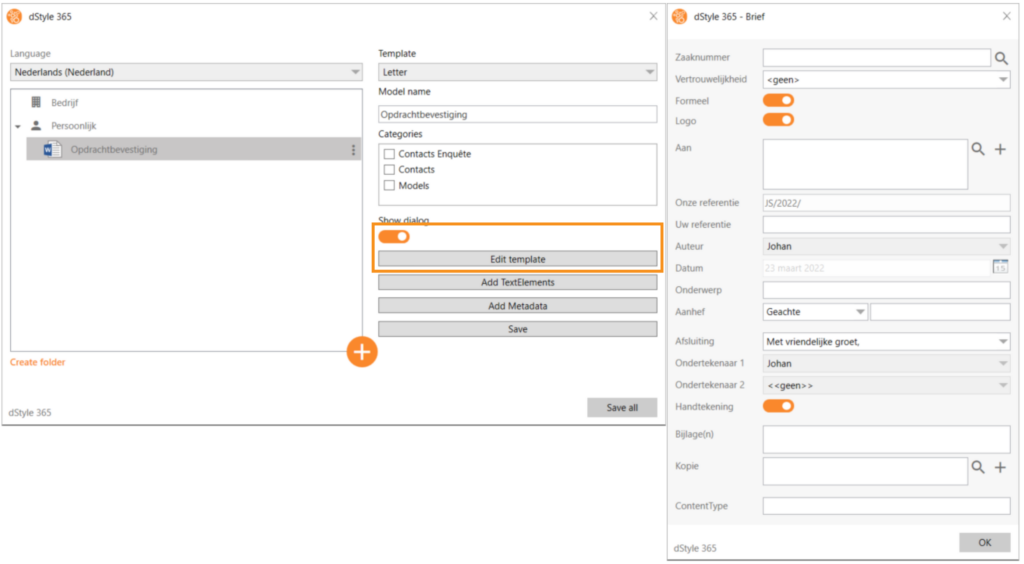
The "Show dialog" slider determines whether users, when opening the model, first see the preliminary dialog box corresponding to the selected template. When you click "Edit template", the preliminary dialog box appears. Here, if desired, you can pre-define certain data. For example, think of the subject or reference. When using the model, this data will already be pre-filled. Of course, this can still be adjusted by the user when opening the model. Click OK in the preliminary dialog box when the data has been filled in to return to the previous screen.
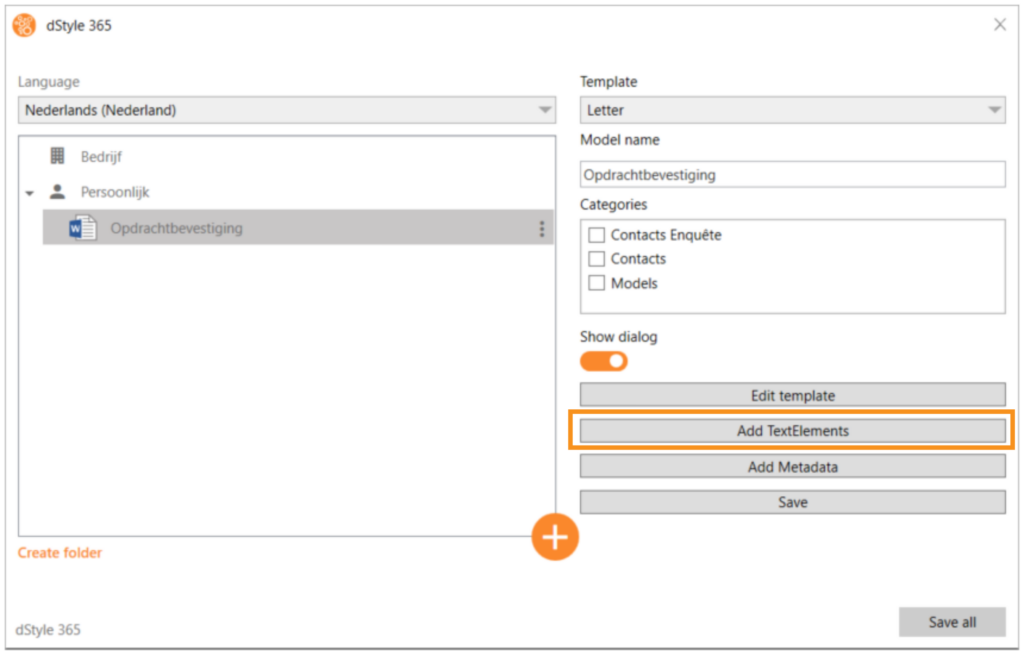
Then click Add TextElements to add text fragments and other elements to the model.
Adding (Text) Elements to the Model
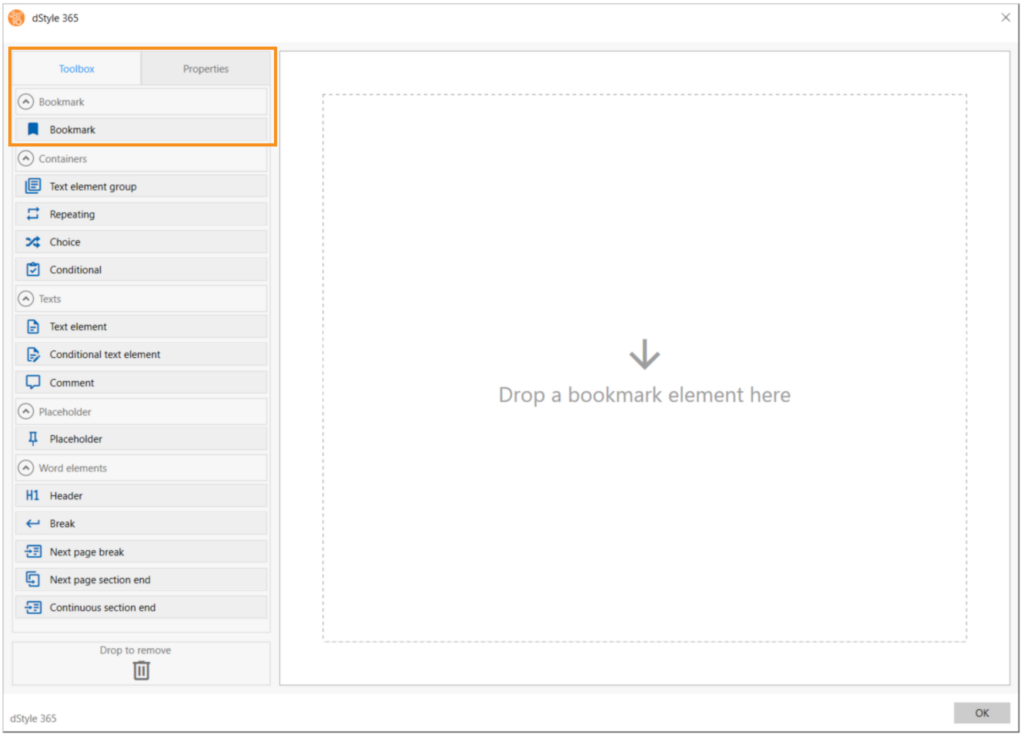
In this screen, you will see the Toolbox tab and the Properties tab at the top. In the Toolbox tab, you select the elements and drag them to the canvas on the right side of the screen. You then further define the element on the Properties tab.
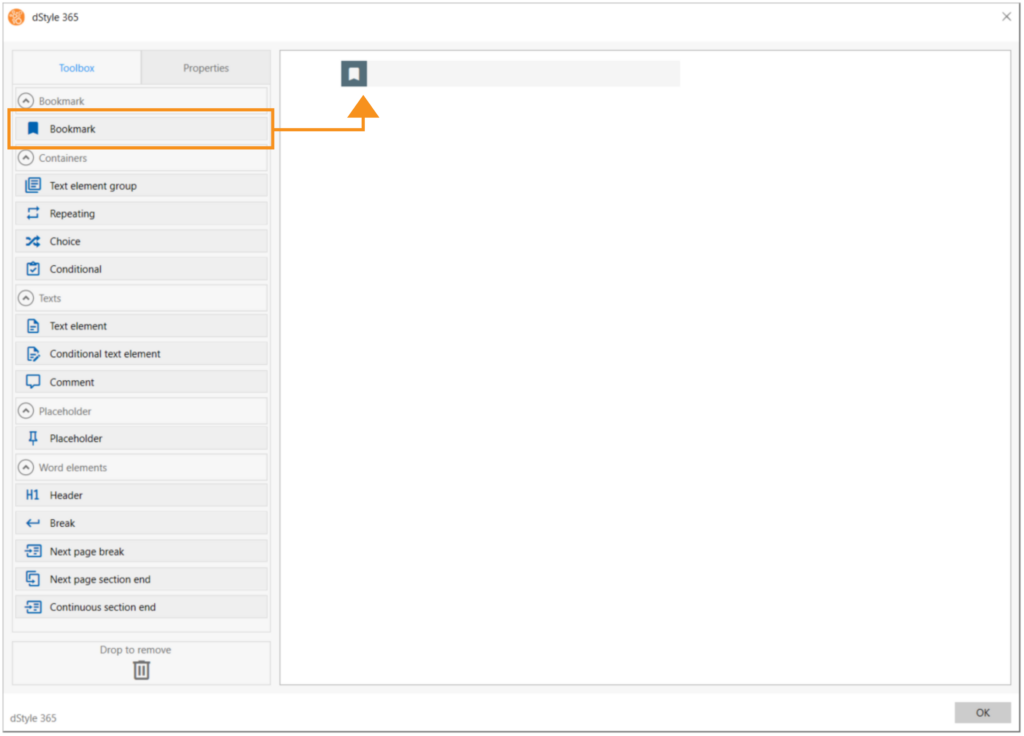
To start, a Bookmark must be dragged onto the canvas. This must correspond to a bookmark placed in the chosen template. Almost all dStyle365/LegalWord365 templates (letter, blank document, procedural document) contain a bookmark named bmStart. This bookmark is placed at the point in the document where content should normally be inserted. For example, at the very top of a blank document and after the salutation in a letter.
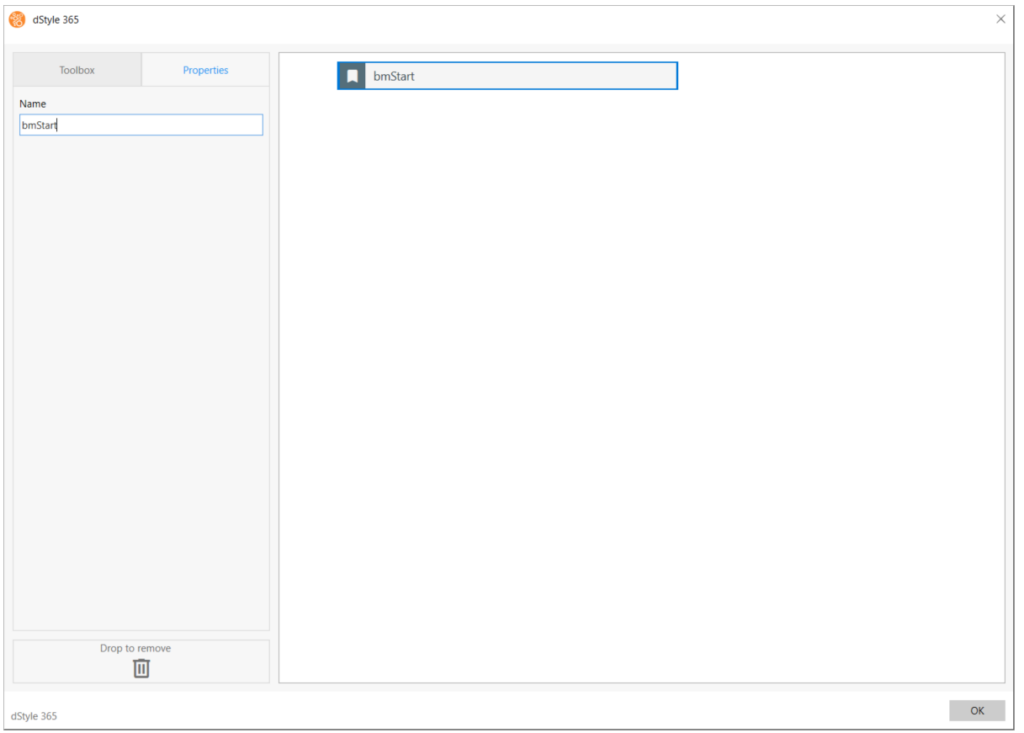
Once we have dragged the Bookmark, we can give it a name on the Properties tab. In this case, bmStart.
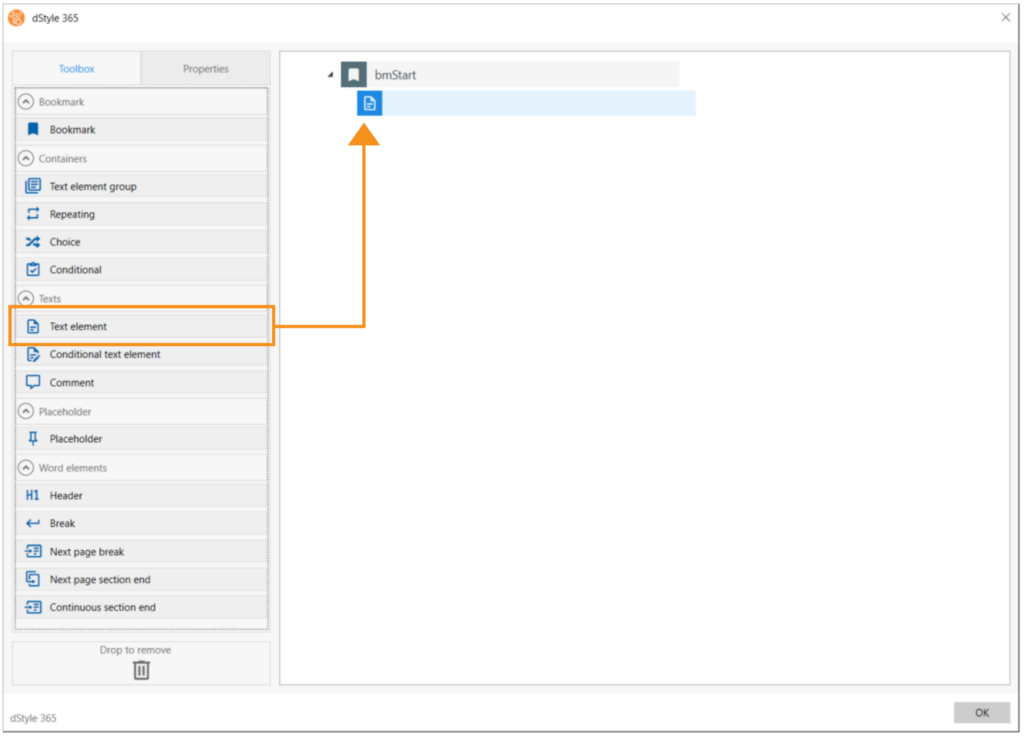
After the Bookmark is placed, we can determine which elements we want to use in our model. This can be a simple text block or, for example, a dropdown list with a choice of different texts that are applicable at that moment for the document we want to create. For now, we choose a text element (a text block) and drag it under the Bookmark.
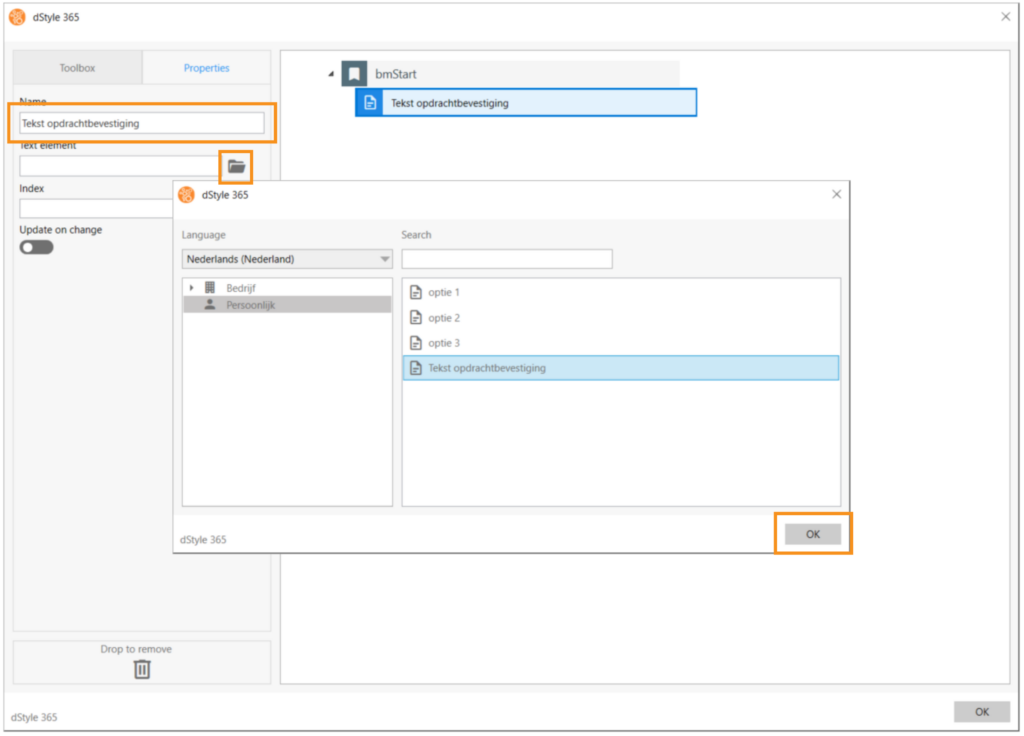
In the Properties tab, we can give the text element a name. When you click the folder icon, the screen will appear where you can search for and select the desired text. Then click OK to close the screen and return to the canvas.
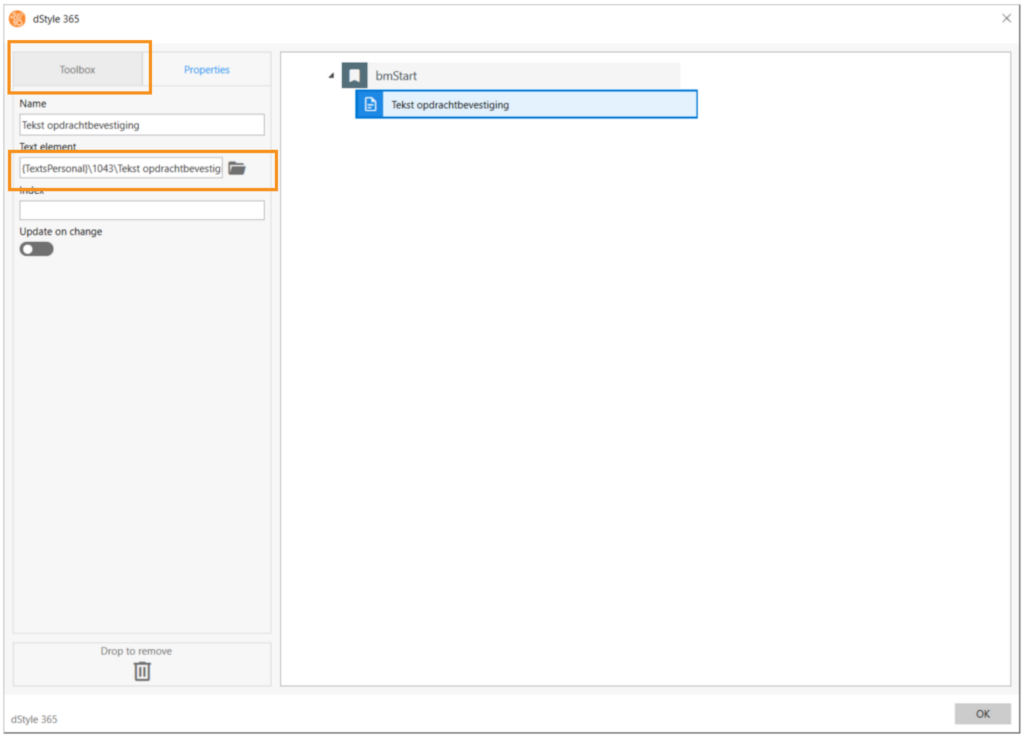
Now the text is selected. Click the Toolbox tab to drag any other elements to the canvas.
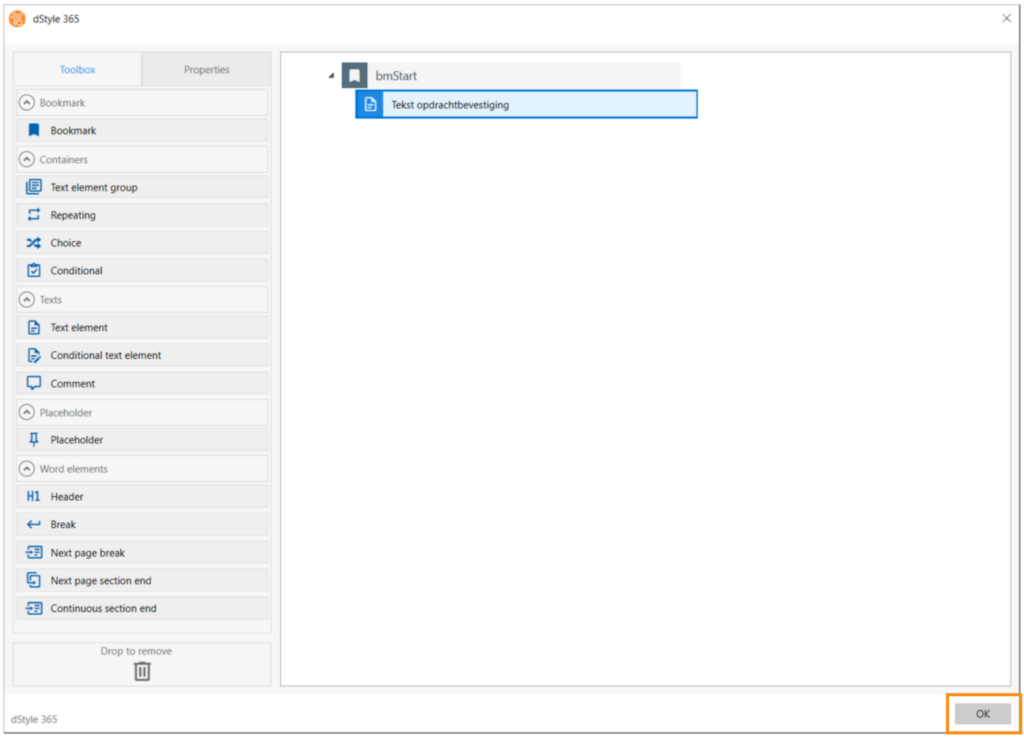
When you are done, click OK to return to the previous screen.
Saving the Dynamic Model
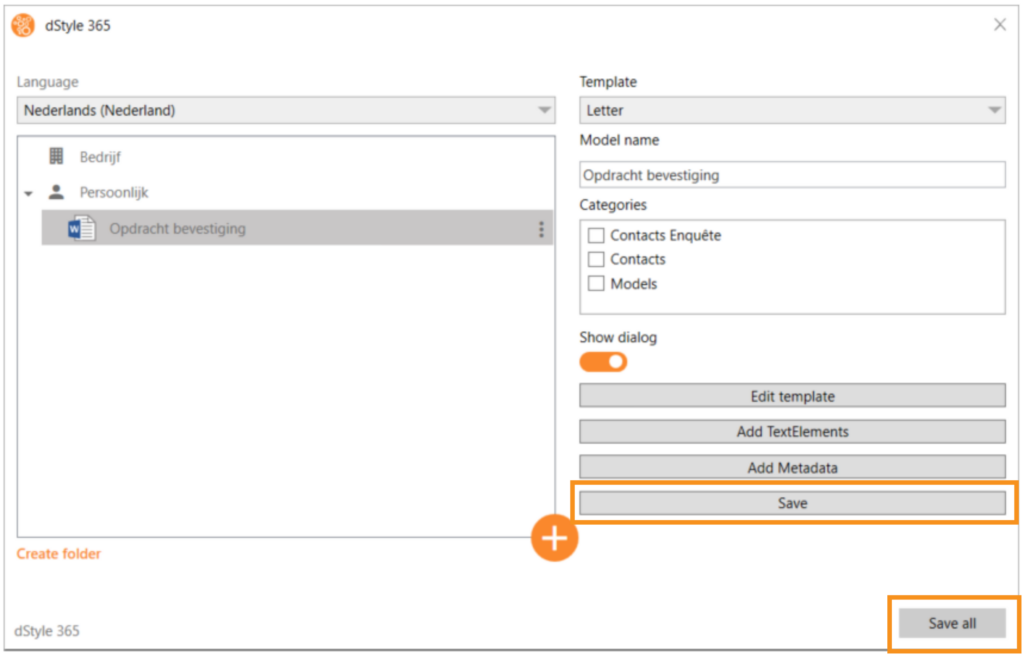
On this screen, click Save and then Save all at the bottom right of the screen to save your model and close the screen.
Opening a Dynamic Model
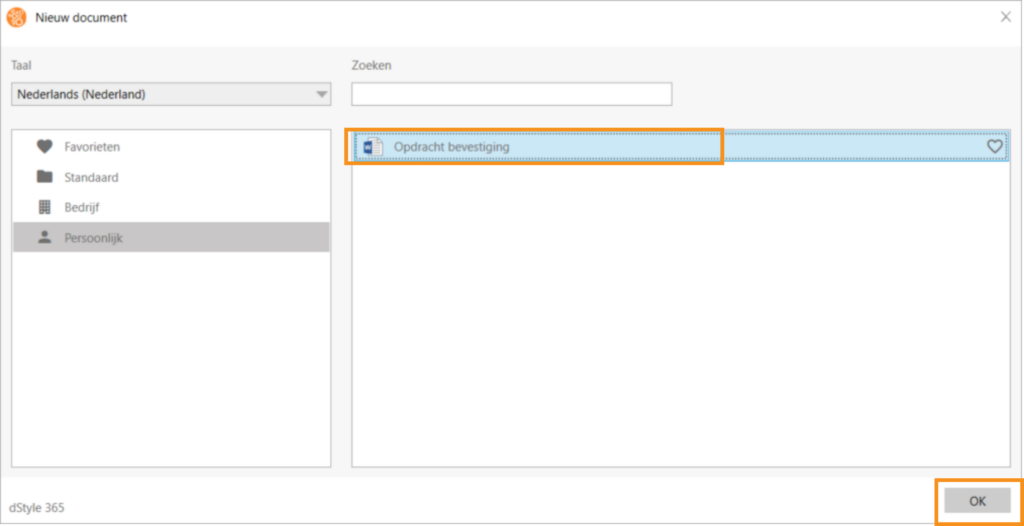
If you click new in the dStyle365/LegalWord365 ribbon to open a new dStyle365/LegalWord365 document, you will find your dynamic model by navigating to it manually or by searching in the search screen.
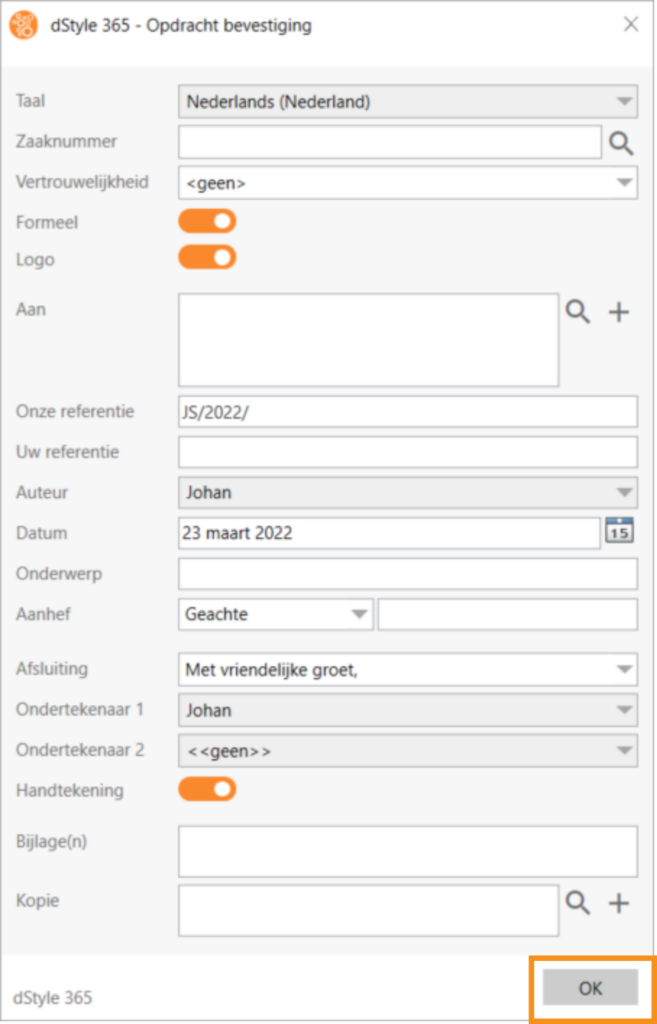
The data you predefined in the model is pre-filled here. Click OK to create a document based on the Dynamic Model.