For digitally or digitally signing e-mails that you are going to send, you can also use the Profiles window, but then the right part of it. There are four options that you can apply, often depending on the generally applicable agreements within your organisation.
Option 1 - Profile selection with e-mail signature
Each time you create a new e-mail, a window will appear in which you have to indicate with which profile you want to sign the e-mail (screen text: Profile choice for e-mail signature).
Option 2 - Manually insert a signature
dStyle skips the set profile and does not generate a signature. You manually add a signature to each mail (screen text: Manually insert a signature).
This option is often used within organizations that automatically generate the correct signature from another connected central system, such as the Microsoft Exchange server. The signature is then placed out of your sight, so after you have clicked the Send button.
Option 3 - E-mail signature with standard profile and language
You apply the default profile if you use the same signature by default. You can also set the language here. By default, the language is set to Dutch. If you choose this option, no dialog box will appear when creating, replying or forwarding messages.
(screen text: E-mail signature with standard profile and language).
Option 4 - No signature when replying or forwarding e-mails
Depending on the generally applicable agreements within your organisation regarding the signing of
When replying or forwarding e-mails, check this option or not (screen text: No signature when replying or forwarding e-mails).

① In the Profiles window, click on the General settings tab.
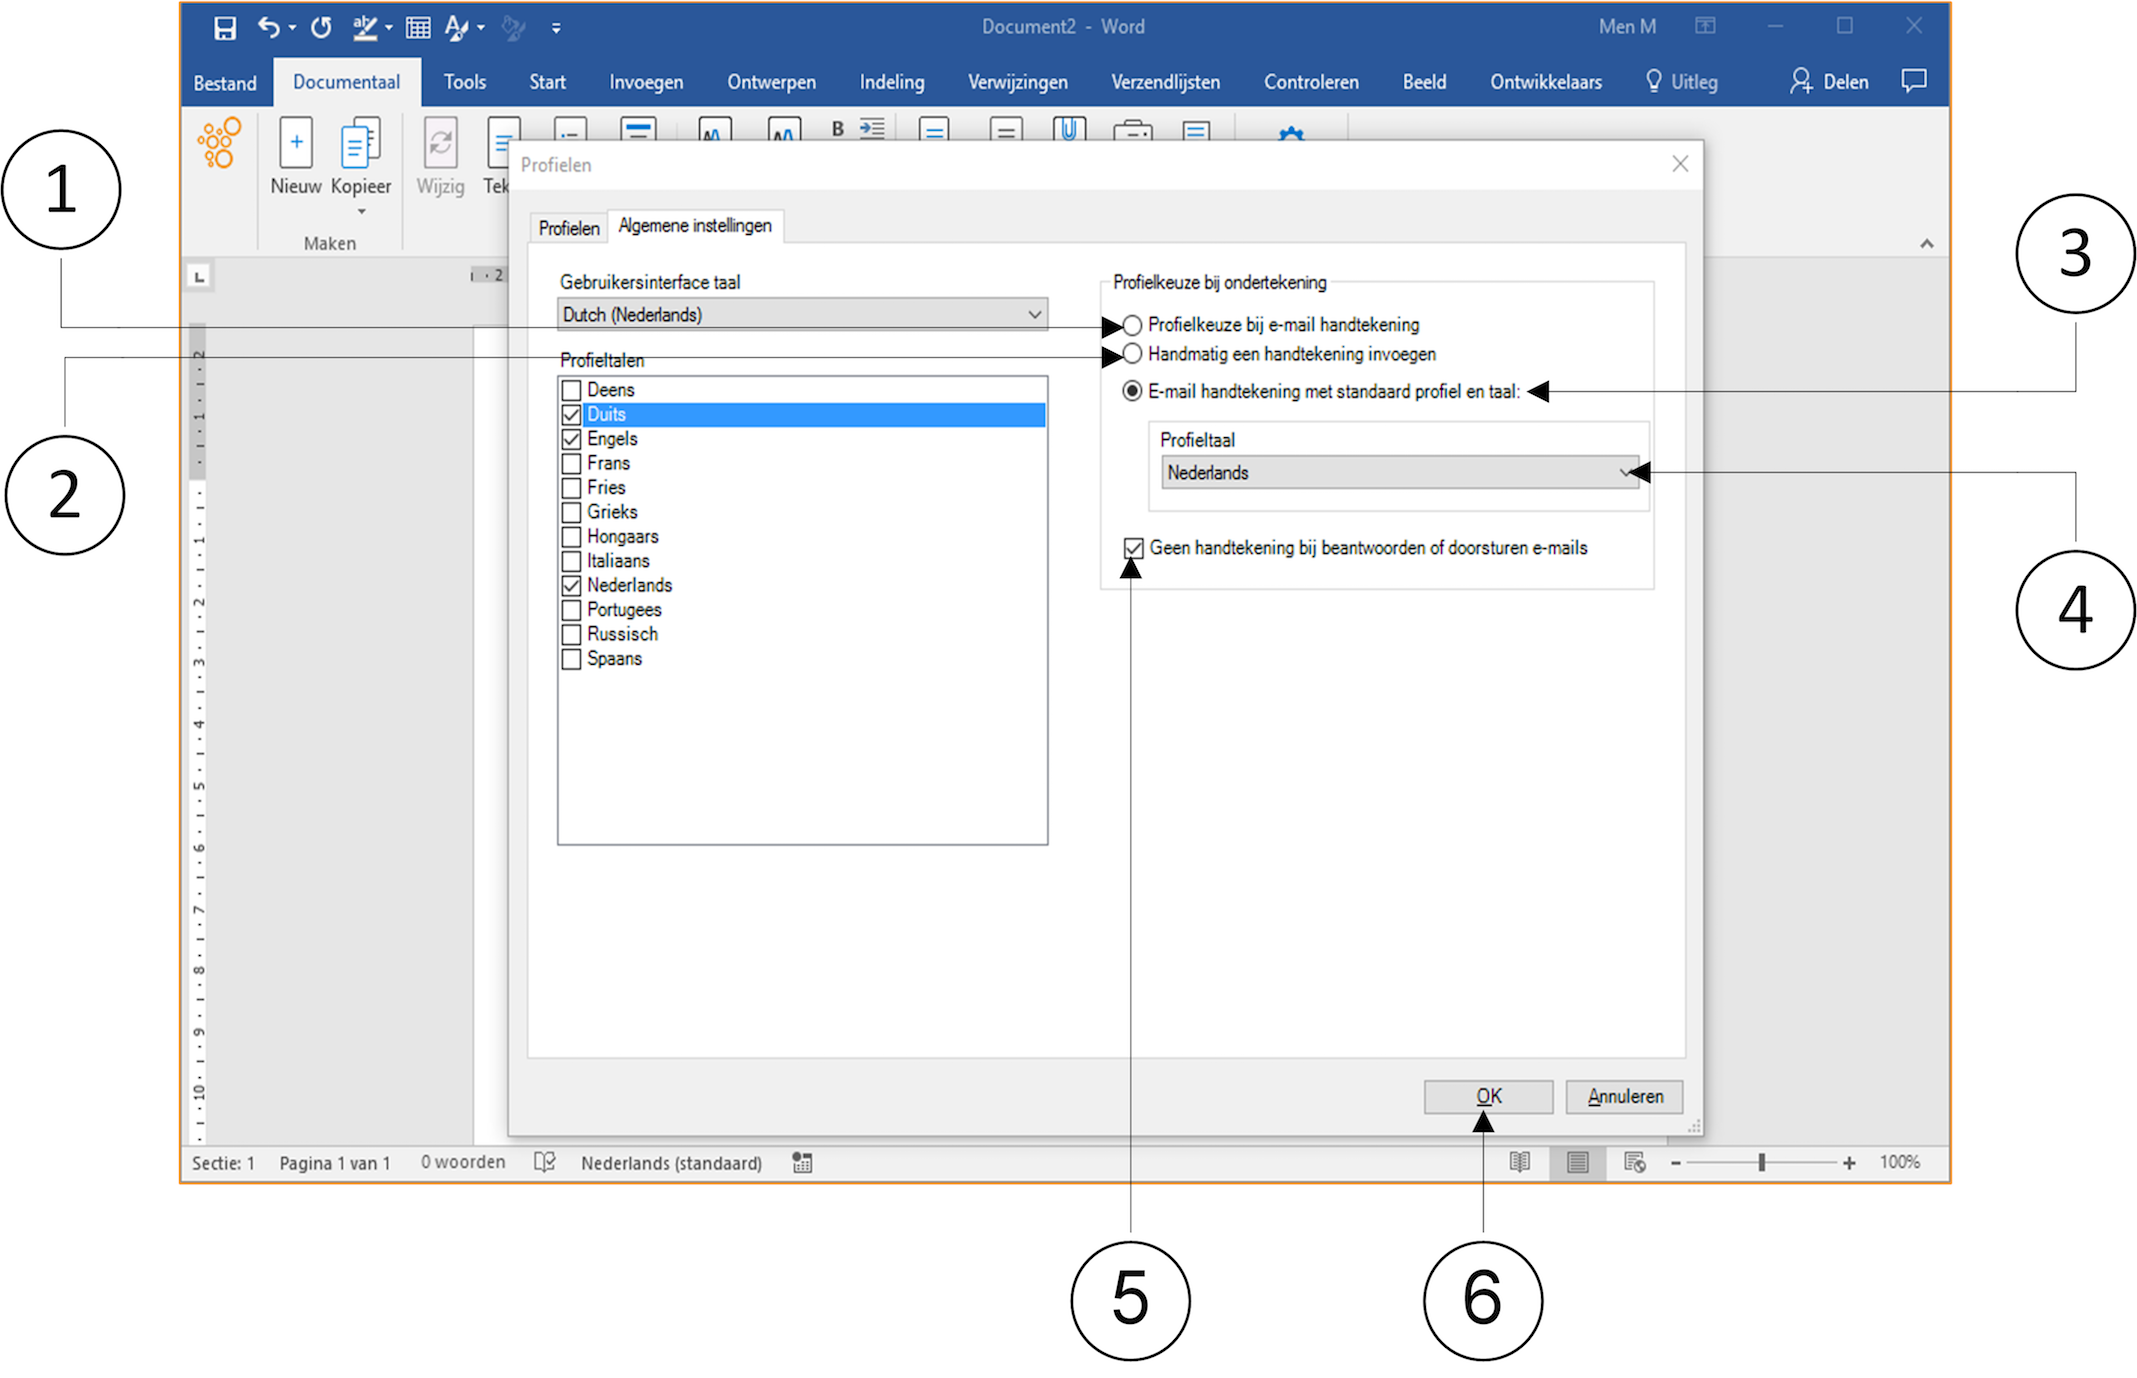
① Set the option Profile choice for e-mail signature
in (option 1).
② Set the option Manually insert a signature (option 2).
③ Set the option E-mail signature with standard profile and language (option 3).
④ Click on the bar under Profile language. A drop-down menu appears. Set the correct language for option 3 here.
⑤ A check mark in the No signature when replying or forwarding emails checkbox.
(No signature when replying or forwarding e-mails) means no signature is placed (option 4).
⑥ Click on the OK button. The Profiles window closes.